Christmas is almost here, which is followed by the new year a week later. Every year, I want to make it a goal of mine to start using a planner. I've bought many notebooks and planners in the past, but I always go back to using my smartphone for keeping track of my daily appointments and activities.
Lately, I've been addicted to looking at planners on Instagram. I'm admiring how people spend time decorating their planners. It must be so happy to write in such colorful planners. Unfortunately, I feel too frugal to spend all that money on stickers and washi tape on a planner that I may throw away once the year is over.
More recently, I found this journaling/planner system called Traveler's Notebook. The system is simply a journal cover with an elastic cord inside to hold notebooks and an elastic cord outside to keep it closed.
Midori is a stationery company that has made the Traveler's Notebook system famous. There are now many companies that make them. The ones that I love the most are fauxdoris made by many crafters on Etsy. They're often made using fabric and can have many designs.
However, one thing that really annoyed me about these Traveler's Notebooks was their size. In Canada, we can readily obtain the letter-size paper, which is 8.5" x 11".
When folded in half to make notebooks, it would be 8.5" x 5.5". Standard Traveler's Notebook inserts often are 8.25" x 4.3", which means that I would need to take out my paper trimmer each time I want to make inserts. That's too much work for me.
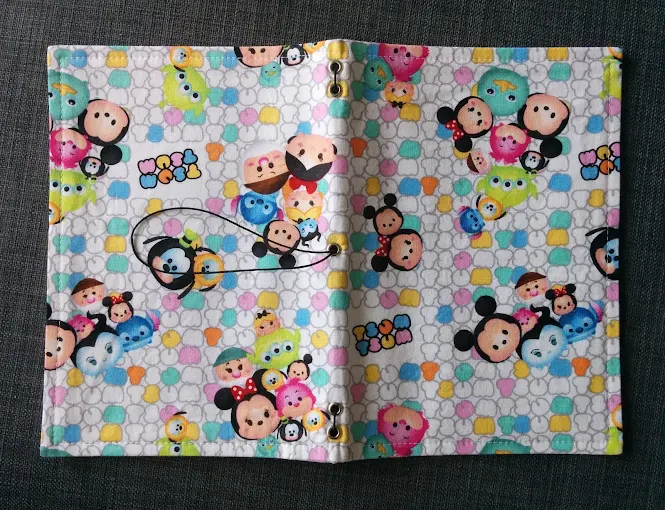
Therefore, I decided to create my own fauxdori so that I can use standard half-letter-sized notebooks. And because I made it, I'm going to name it Julidori. Feel free to name yours after yourself (yourname-dori)!

What You Need / Materials
Most of these items can be purchased through our affiliate links. Purchasing items through these links will not cost you any extra money. Please see our disclosure policy for more details.- Fabric (click here to see a selection of Disney pattern fabric)
- Interfacing/Cardstock
- Eyelets (I used 4mm)
- Elastic Cords
- Sewing Machine
1. Trim your fabric and interfacing
First, you will need to cut your fabric and interface it to obtain the measurements: 14" x 10". You will end up with 4 pieces altogether: 2x fabric pieces and 2x interfacing pieces. One set (fabric + interfacing) for the inside and one set for the outside. Because the Disney Tsum Tsum fabric was so expensive, I used a different fabric pattern on the inside.
2. Iron on your interfacing
Next, iron on the interfacing that you just cut out onto the WRONG side of the fabric. This process is to make your fabric stiffer so it can work as a notebook cover. Do this to both pieces of fabric using both pieces of interfacing.
3. Sewing your cover
Put your two pieces of fabric right side together and sew 1/2" around on the WRONG side. Make sure you leave a gap of approximately 5-6" so you can turn it right side out later.
Before you turn it right side out, cut off the corners. This will make it look nicer and not as bulky when you iron it out later. Make sure you don't cut too close so that your thread will unravel.
Turn your piece right side out through the gap you left off. Use an awl or chopstick to push out the corners and then iron out the wrinkles.
Then sew around your cover again 1/4" from the edge. This time, on the right side. Make sure you fold in and sew over the gap that you left earlier for turning so that it closes up nicely.

In a perfect world, you would end up having a piece that measures 13.5" x 9.5". But we don't live in a perfect world. With the error of measurements with cutting, folding, and sewing, it's going to be OK if your fauxdori measures slightly smaller.
4. Set your eyelets
Set your eyelets at 0.5" and at 1" from the edge at the midline of the fabric where the fold is going to be. This one is going to be for the elastics meant for your notebook inserts. Then add one right in the middle. This one is going to be for the elastic to hold your notebook closed.

5. String in your elastic cords.


Alternatively, if you don't have access to interfacing, you can try using a piece of cardstock instead. You can do this by first sewing 3 sides of your fabric together leaving one side open.
Turn it right side out. Then measure and cut a piece of cardstock that will fit into your fauxdori precisely.
Insert your cardstock into your fauxdori and fold in the opening. Sew around your fauxdori, making sure you sew over your fabric and cardstock to secure it in place.
You can actually fit 2-3 half-letter-size notebooks in your fauxdori depending on the thickness of your notebook.
Note: The notebook in the photo below is actually smaller than a half-letter size which is why there's so much room on the sides.


And there you have it! Your very own fauxdori to enjoy!
Did you make your own Fauxdori Traveller's Notebook? I'd love to see it! Please share it with me on Instagram and/or use the #onceuponacheerio hashtag.

This is an original tutorial written by Juli Anne of Once Upon a Cheerio. Please do not claim this tutorial as your own. If you wish to share this tutorial, you may link to this blog post but please do not reprint it on your site. You may keep a copy for personal use but please DO NOT sell or distribute the tutorial.


Post a Comment