Now you didn't think that I would write a post about the Top 10 DIY Letterboard Tutorials out there on the internet and leave you at that, did you? Of course not!

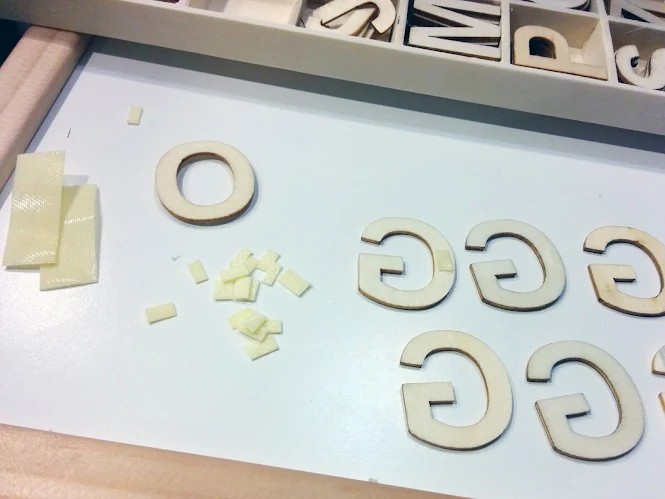
A few weeks ago, I posted on my Instagram story that I found a pack of these 1" wooden letters at Dollarama's craft section for $4.
There are 6 of each letter, and it comes with a box separating them too. My brain clicked and I immediately thought of what I could possibly do with them!
That's right! Make my own letter board!

To no one's surprise, I have access to a lot of yarn. So I figured, let's make my letter board USING YARN!
So if you are interested in this craft, while you are at the dollar store, you might as well also pick up some double-sided tape and a photo frame.

I brainstormed a lot in terms of how I can make the letters cling to the yarn. Naturally crocheted/knitted fabric has a lot of "holes" in them.
So initially I tried gluing a small piece of wire that sticks out of the back of the letters and I can just wedge it in there.
However, I decided to throw that out the window because it was just too much work and frankly, kind of dangerous because it was kind of sharp. So I went with the next best thing -- Velcro.
I found that the typical type of Velcro that they often sell in stores was quite rough and I get the feeling it would ruin if the crocheted fabric is affixed.
So... here's a question: Have you ever changed a disposable diaper? Don't get disgusted, but yes, the Velcro on disposable diapers is exactly the type of Velcro I was looking for!
They are soft, the hooks are much smaller, and they can cling to the yarn fabric without snagging and ruining it.

Given that I have a baby at home, I have access to a lot of disposable diapers. However, if you aren't as lucky as I am (sarcasm intended), I would say give the regular Velcro a try, because honestly, you only need a very tiny piece on the back of each letter.
So onto the DIY, shall we?

What You Need / Materials
Most of these items can be purchased through our affiliate links. Purchasing items through these links will not cost you any extra money. Please see our disclosure policy for more details.- Yarn (color of your choice)
- Crochet Hook (size of your choice, I used 4.5 mm and 4.0 mm)
- Photo Frame
- 1" Plastic/Wooden Letters
- Baby Velcro
- Double-sided tape
- Yarn Needle
- Stitch Markers
- Scissors
Stitches & Abbreviations
- st/sts - stitch/stitches
- ch - chain
- hdc - half double crochet
1. Crocheting Your Fabric
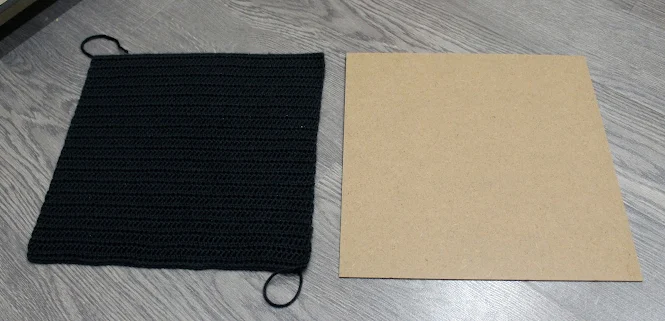
I started with a chain that is the width of the backing of my photo frame because I wanted to make sure that my fabric will fit perfectly without sticking out too much.
Note: I found that I had the most success keeping the crocheted fabric square by changing to a smaller hook after the first row. So I end up using a 4.5mm crochet hook for the foundation chain and row 1, then changed to a 4.0mm crochet hook for the rest of the piece.
Row 1: Ch 2, hdc into the third chain from the hook, and then in each st across
Row 2: Ch 2, turn, hdc in each st across
Row 3 and onwards: Repeat row 2
Complete and fasten off when you've reached the height of the photo frame backing.
Keep in mind the stretch of the crocheted fabric. You do not want to have too much excess on the sides because it will be difficult to put the backing back onto the frame.

2. Assembling Your Letter Board
Place some double-sided tape on all four corners of the backing of the photo frame and then place your crocheted fabric on top, matching all four sides.
If your photo frame is bigger and you don't want the middle of the fabric to slump, I would place a couple more pieces of double-sided tape in the center.

Now it may not completely match and you might have some areas looser than others. So gently just tug and press your crocheted piece until you have it lined up exactly.
Put the backing back into the frame and ta-da! There you have it! Your crocheted letter board!

Ain't it pretty?!?!?
3. Preparing Your Letters
Now I won't lie to you, this part took the most work because I was initially using hot glue to put on the Velcro (dumb move). But once I started using the double-sided tape that I bought later on, the process became so much faster!
All you really need is 1-2 tiny pieces of Velcro on the back of each letter. Stick it down with some double-sided tape, and that's it!

Congratulations! You have just crocheted your very own letter board. Talk about practical!

I would love to know whether store-bought letter board letters would work on this crocheted letter board. Unfortunately, nowhere nearby where I live sells letter boards and/or their accessories.
Not surprisingly, Canada is often so behind the times. So if you have an extra set and would like to donate them to me, let me know! *wink wink nudge nudge*
Did you make your own Crochet letterboard? I'd love to see it! Please share it with me on Instagram and/or use the #onceuponacheerio hashtag.

This is an original tutorial written by Juli Anne of Once Upon a Cheerio. Please do not claim this tutorial as your own. If you wish to share this tutorial, you may link to this blog post but please do not reprint it on your site. You may keep a copy for personal use but please DO NOT sell or distribute the crochet tutorial.
You may sell products made from this craft/crochet tutorial, but please clearly credit the design to me, Juli Anne of Once Upon a Cheerio and provide a link to my blog www.OnceUponaCheerio.com. Permission is NOT granted for mass production or factory manufacturing of any kind. Thank you for understanding!
You may sell products made from this craft/crochet tutorial, but please clearly credit the design to me, Juli Anne of Once Upon a Cheerio and provide a link to my blog www.OnceUponaCheerio.com. Permission is NOT granted for mass production or factory manufacturing of any kind. Thank you for understanding!


Post a Comment