If you would like to purchase an ad-free PDF version of this crochet pattern, you can find it in my Ravelry Store.
I hope you guys all had a fabulous weekend and was enjoy some sunshine. Today is actually a holiday for us in British Columbia (Canada)! If you don't already know, I come from the beautiful city of Vancouver, BC. So if you are a local here, Happy BC Day!
Mondays are usually so... BLAH! But during the month of August, I will be publishing a part of the crochet-along for the Mini Mimi doll base crochet pattern. So at least there's something to look forward to, right?
Anyway, enough nonsense! Are you excited about the first part of this crochet-along? Let's get started, shall we? If you need a reference here is the list of materials.

Mini Mimi Amigurumi Doll Crochet Pattern
Head
Using a 3.0 mm crochet hook with skin color yarn...
Round 1: Magic Ring with a base of 6 sc (6 sts)
Round 2: Sc inc in each st around (12 sts)
Round 3: [Sc, sc inc] x 6 times (18 sts)
Round 4: [Sc, sc inc, sc] x 6 times (24 sts)
Round 5: [3 sc, sc inc] x 6 times (30 sts)
Round 6: [2 sc, sc inc, 2 sc] x 6 times (36 sts)
Round 7: [5 sc, sc inc] x 6 times (42 sts)
Round 8: Sc in each st around (42 sts)
Round 9: [3 sc, sc inc, 3 sc] x 6 times (48 sts)
Round 10-17: Sc in each st around (48 sts)
Round 18: [4 sc, sc dec] x 8 times (40 sts)
Round 19: Sc in each st around (40 sts)
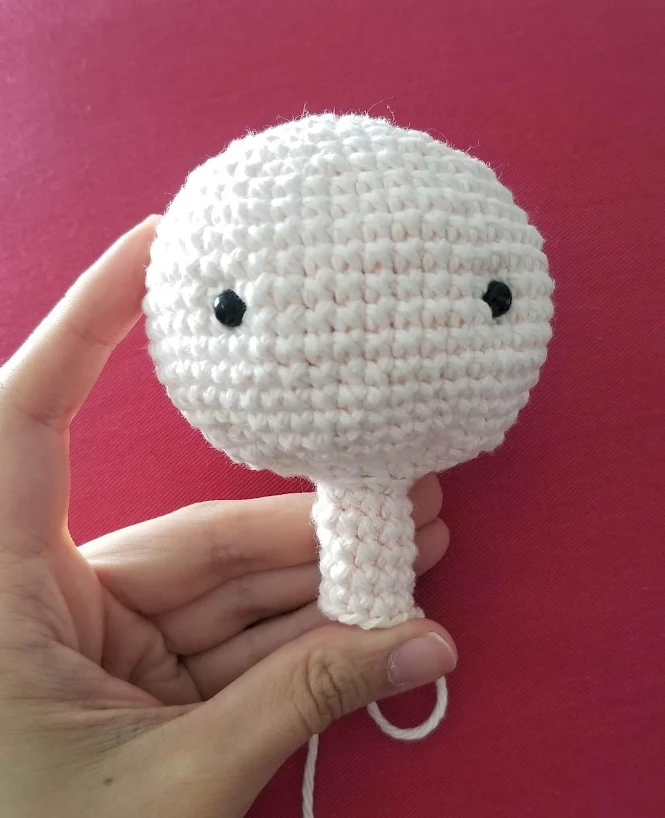
Before you start decreasing your stitches and the size of the opening, put in your safety eyes between rounds 12 and 13, about 10 sts apart.
Stuff the head with poly-fil firmly as you go.
Round 20: [Sc, sc dec, sc] x 10 times (30 sts)
Round 21: [Sc, sc dec] x 10 times (20 sts)
Round 22: Sc dec in each st around (10 sts)
Round 23: Sc BLO in each st around (10 sts)
Round 24-28: Sc in each st around (10 sts)
Cut and fasten off.
At this point, you might be wondering why the heck is the neck so abnormally long???

Well, What I want you to do next is to push that long tube of a neck into the doll's head. This will create a sturdier and more balanced head on the neck of the doll later on.
The head can also pivot and rotate!
It will take some effort to get it in. I injured my nail at one point trying to get that stupid neck inside. Just be careful and work it starting from the base of the stem (closest to the head).


And then at some point, you'll get it in...

Woohoo! Celebrate time!
Thanks for joining me on Part 2 of this Mini Mimi CAL! Stay tuned for Part 3 to come out the following Monday! Also, don't forget to share with me your progress. I hope to be able to gather enough photos for a Mini Mimi gallery!
Remember to like Once Upon a Cheerio on Facebook. I'd also love it if you followed @onceuponacheerio on Instagram!
Don't have time to make it right this instant? Pin it for later!
This crochet pattern is available as a crochet-along for FREE on this website. If you'd like the complete ad-free printable PDF version, you can purchase it for a small fee from my Ravelry shop.
Links for Mini Mimi's Crochet Pattern
Note: links will be added as the information becomes available.
- Part 1: Materials & Preparation
- Part 2: Head
- Part 3: Arms and Legs
- Part 4: Body
- Part 5: Hair
Are you working on this Mini Mimi CAL with us? I'd love to see it! Please share your progress with me on Instagram and/or use the hashtags #onceuponacheerio and #minimimiCAL
This is an original crochet pattern written by Juli Anne of Once Upon a Cheerio. Please do not claim this crochet pattern as your own. If you wish to share this crochet pattern, you may link to this blog post but please do not reprint it on your site. You may keep a copy for personal use but please DO NOT sell or distribute the crochet pattern.
You may sell products made from this crochet pattern, but please clearly credit the design to me, Juli Anne of Once Upon a Cheerio and provide a link to my blog www.OnceUponaCheerio.com. Permission is NOT granted for mass production or factory manufacturing of any kind. Thank you for understanding!


Post a Comment