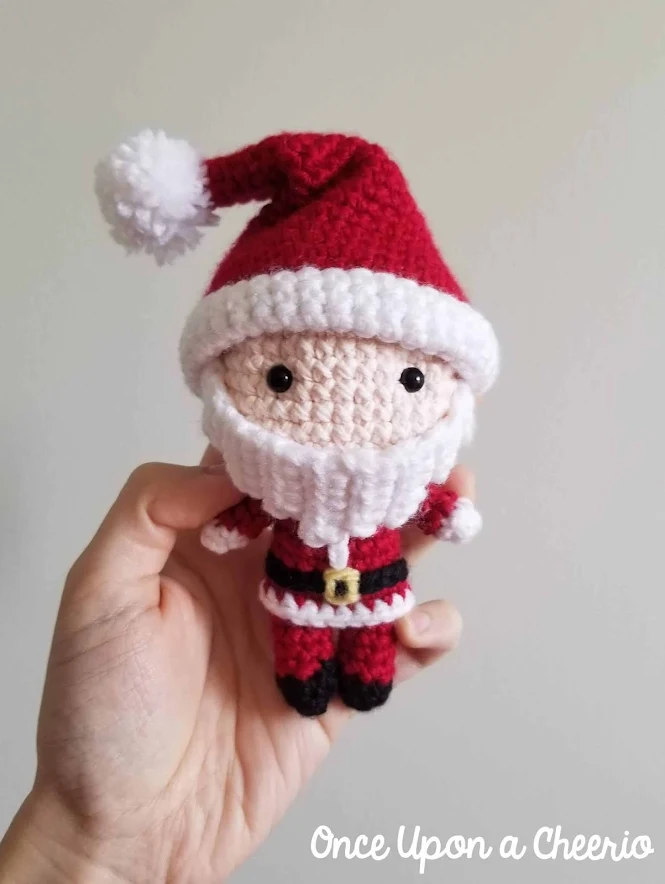
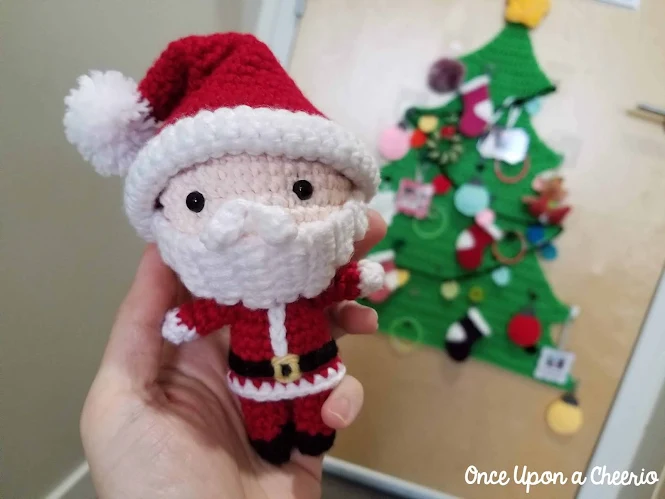
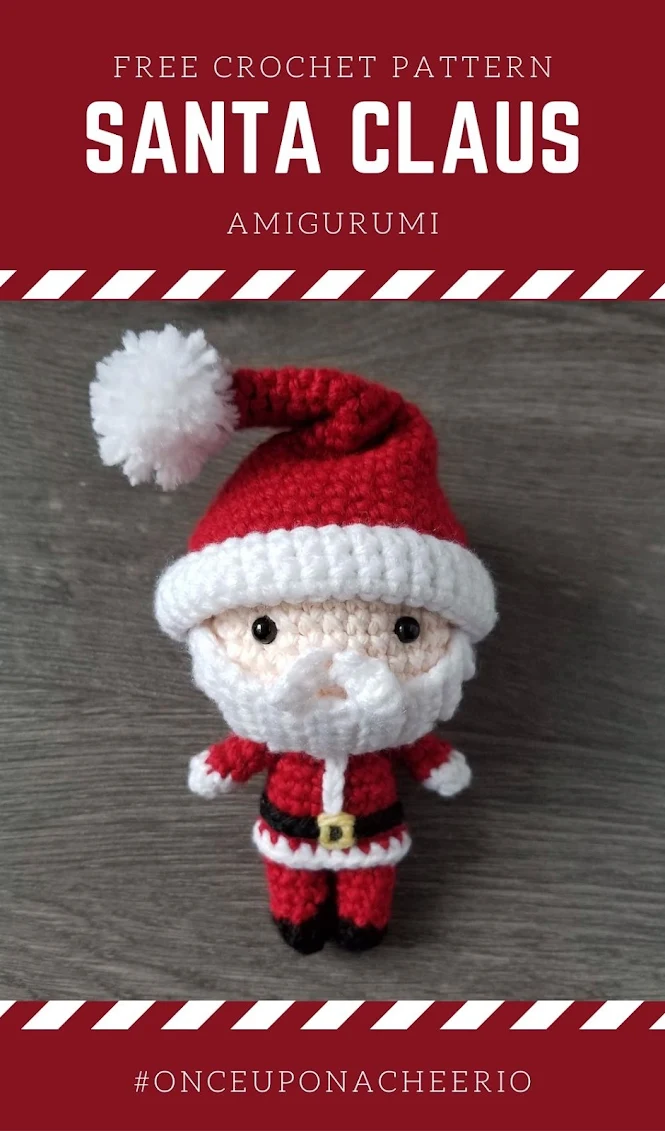
Christmas is my favorite time of the year and this is probably the cutest Santa amigurumi that I have ever crocheted. I loved my Santa Baby amigurumi crochet pattern so much on its own I decided to publish him on his own first without the beard and then add it on later.
I actually had some issues when it came to designing his beard. Apparently, a beard without a mustache is an Amish beard. It turned out I just needed to add a mustache to make him look more like... Santa.
Who'd thought that beards and mustaches were so technical?

The mini amigurumi Santa Claus without the beard is also very cute and I think you should check him out. I decided to name him my amigurumi Santa Baby.
So let's get crackin' and finish making your amigurumi Santa Claus before Christmas is over! I wish you all a wonderful Christmas and a Happy New Year!
Remember to like Once Upon a Cheerio on Facebook. I'd also love it if you followed @onceuponacheerio on Instagram!
Don't have time to make it right this instant? Pin it for later!
Santa Claus Amigurumi FREE Crochet Doll Pattern
This crochet pattern is available for FREE on this website. If you'd like an ad-free, printable PDF version, you can purchase it for a small fee from my Ravelry shop.
What You Need / Materials
Most of these items can be purchased through our affiliate links. Purchasing items through these links will not cost you any extra money. Please see our disclosure policy for more details.- Worsted weight yarn in the following colors:
- Peach (I used Lily Sugar N' Cream Scents in Chamomile)
- Red (I used Caron Simply Soft in Autumn Red)
- White (I used Red Heart Super Saver in White)
- Black (I used Caron Simply Soft in Black)
- Yellow (similar to Red Heart Super Saver in Bright Yellow)
- 3.0 mm Crochet Hook
- Safety Eyes (I used 6.0 mm)
- Poly-fil or any Polyester Stuffing of your choice
- Yarn Needle
- Stitch Markers
- Scissors
Stitches & Abbreviations
- st/sts - stitch/stitches
- ch - chain
- slst - slip stitch
- sc - single crochet
- hdc - half double crochet
Notes
- I used a half-color changing technique to achieve cleaner lines when changing colors from one row to another.
- This crochet pattern is available for FREE on this website. If you'd like an ad-free, printable PDF version, you can purchase it for a small fee from my Ravelry shop.
- Finished measurements: approximately 15 cm / 5.9 inches
Amigurumi Santa Claus Crochet Pattern
Head
Using a 3.0 mm crochet hook with peach yarn...
Round 1: Magic Circle with a base of 6 sc (6 sts)
Round 2: Sc inc in each st around (12 sts)
Round 3: [Sc, sc inc] x 6 times (18 sts)
Round 4: [Sc, sc inc, sc] x 6 times (24 sts)
Round 5: [3 sc, sc inc] x 6 times (30 sts)
Round 6: [2 sc, sc inc, 2 sc] x 6 times (36 sts)
Round 7: [5 sc, sc inc] x 6 times (42 sts)
Round 8-14: Sc in each st around (42 sts)
Round 15: [5 sc, sc dec] x 6 times (36 sts)
Round 16: [2 sc, sc dec, 2 sc] x 6 times (30 sts)
Round 17: [3 sc, sc dec] x 6 times (24 sts)
Put in your safety eyes. I put mine between rows 10 and 11, about 7 stitches apart. Stuff the head with poly-fil before the opening gets too small.
Round 18: [Sc, sc dec, sc] x 6 times (18 sts)
Round 19: [Sc, sc dec] x 6 times (12 sts)
Round 20: Sc BLO in each st around (12 sts)
Round 21-23: Sc in each st around (12 sts)
Cut and fasten off. Stuff firmly and push rows 20-23 inside the head to create a tunnel and a hole for the neck to go into later.
Arms (x2)
Using a 3.0 mm crochet hook with peach yarn...
Round 1: Magic Ring with a base of 6 sc (6 sts)
Round 2: Sc in each st around (6 sts)
Change to red yarn...
Round 3-5: Sc in each st around (6 sts)
Cut and fasten off.
Legs and Body
Using a 3.0 mm crochet hook with black yarn...
Round 1: Magic Ring with a base of 6 sc (6 sts)
Round 2: [2 Sc, sc inc] x 2 times (8 sts)
Round 3: Sc in each st around (8 sts)
Change to red yarn...
Round 4-7: Sc in each st around (8 sts)
Cut and fasten off the first leg.
Repeat rounds 1-7 to make a second leg. Do not cut or fasten off, instead, finish off with a Ch 2.
Round 8: Join the second leg with the first leg. 8 sc around the first leg, 2 sc along the ch, 8 sc around the second leg, 2 sc along the other side of the ch (20 sts)
Round 9: Sc in each st around (20 sts)
Round 10: Sc BLO in each st around (20 sts)
Round 11-12: Sc in each st around (20 sts)
Round 13: 4 sc, 6 sc around the first arm, 10 sc, 6 sc around the second arm, 6 sc (32 sts)
Round 14: Sc dec in each st around (16 sts)
Round 15: Sc dec in each st around (8 sts)
Round 16-20: Sc in each st around (8 sts)
Cut and leave a long tail to attach the body to the head by threading the yarn tail through the hole on the bottom of the head. Then sew it to the top of the head and then sew it to the neck again to secure it. Do this a few times to make sure your head is secured.
Bottom of Santa Coat
Work on the front loops from round 10 with the doll legs facing away from you. Using a 3.0 mm crochet hook and red yarn...
Round 1: Sc join to the front loops from round 10, sc in each st around (20 sts)
Change to white yarn...
Round 2: Sc in each st around (20 sts)
Cut and fasten off.
Santa Hat
Using a 3.0 mm crochet hook and red yarn...
Round 1: Magic Ring with a base of 4 sc (4 sts)
Round 2: [Sc, sc inc] x 2 times (6 sts)
Round 3: [2 sc, sc inc] x 2 times (8 sts)
Round 4: [3 sc, sc inc] x 2 times (10 sts)
Round 5: [4 sc, sc inc] x 2 times (12 sts)
Round 6: [5 sc, sc inc] x 2 times (14 sts)
Round 7: [6 sc, sc inc] x 2 times (16 sts)
Round 8: [7 sc, sc inc] x 2 times (18 sts)
Round 9: [8 sc, sc inc] x 2 times (20 sts)
Round 10: [9 sc, sc inc] x 2 times (22 sts)
Round 11: [10 sc, sc inc] x 2 times (24 sts)
Round 12: [11 sc, sc inc] x 2 times (26 sts)
Round 13: [12 sc, sc inc] x 2 times (28 sts)
Round 14: [13 sc, sc inc] x 2 times (30 sts)
Round 15: [14 sc, sc inc] x 2 times (32 sts)
Round 16: [15 sc, sc inc] x 2 times (34 sts)
Round 17: [16 sc, sc inc] x 2 times (36 sts)
Round 18: [17 sc, sc inc] x 2 times (38 sts)
Round 19: [18 sc, sc inc] x 2 times (40 sts)
Round 20: [19 sc, sc inc] x 2 times (42 sts)
Round 21: [20 sc, sc inc] x 2 times (44 sts)
Round 22-23: Sc in each st around (44 sts)
Change to white yarn...
Round 24-27: Sc in each st around (44 sts)
Fold up the white rows to create some dimension to the hat.
Cut, and fasten off.
Beard
Using a 3.0 mm crochet hook with white yarn...
Row 1: Ch 4, hdc into the 3rd ch from the hook, 1 hdc (2 sts)
Row 2: Ch 1, turn, 2 slst BLO
Row 3: Ch 3, turn, hdc into the 3rd ch from the hook, hdc into each st across (3 sts)
Row 4: Ch 1, turn, 3 slst BLO
Row 5: Ch 2, turn, 3 hdc into each st across (3 sts)
Row 6: Ch 1, turn, 3 slst BLO
Row 7: Ch 4, turn, hdc into the 3rd ch from the hook and up the ch, hdc into each st across (5 sts)
Row 8: Ch 1, turn, 5 slst BLO
Row 9: Ch 3, turn, hdc into the 3rd ch from the hook, 5 hdc into each st across (6 sts)
Row 10: Ch 1, turn 5 slst BLO
Row 11: Ch 2, turn, hdc into each st across (5 sts)
Row 12: Ch 1, turn, 3 slst BLO
Row 13: Ch 2, turn, hdc into each st across (3 sts)
Row 14: Ch 1, turn, 3 slst BLO
Row 15: Ch 2, turn, hdc into each st across (3 sts)
Row 16: Ch 1, turn 2 slst BLO
Row 17: Ch 2, turn, hdc into each st across (2 sts)
Cut and leave a tail to sew onto the face.
Mustache
Using a 3.0 mm crochet hook with white yarn...
Row 1: Ch 4, sc into the 2nd ch from the hook and up the ch (3 sts)
Row 2: Repeat row 1
Cut and leave a tail to sew onto the face.

Assembly
For the belt, I used black yarn to make a chain of 21 and sewed it above row 10 on the body. Then use some yellow yarn and embroider the buckle on the belt.
To add some finishing touches to Santa's coat, I used some white yarn to make a ch of 5 and sewed it vertically on the jacket.
The pompom on the top of the hat was made using white yarn. I used a fork to make the pompom and it came out the perfect size!

Did you make your own Santa Claus amigurumi? I'd love to see it! Please share it with me on Instagram and/or use the #onceuponacheerio hashtag.
This is an original crochet pattern written by Juli Anne of Once Upon a Cheerio. Please do not claim this crochet pattern as your own. If you wish to share this crochet pattern, you may link to this blog post but please do not reprint it on your site. You may keep a copy for personal use but please DO NOT sell or distribute the crochet pattern.
You may sell products made from this crochet pattern, but please clearly credit the design to me, Juli Anne of Once Upon a Cheerio and provide a link to my blog www.OnceUponaCheerio.com. Permission is NOT granted for mass production or factory manufacturing of any kind. Thank you for understanding!
You may sell products made from this crochet pattern, but please clearly credit the design to me, Juli Anne of Once Upon a Cheerio and provide a link to my blog www.OnceUponaCheerio.com. Permission is NOT granted for mass production or factory manufacturing of any kind. Thank you for understanding!


Post a Comment