I have been to Japan more than a dozen times in my lifetime. All of it was with my family. Unfortunately, I relied on them so much that if I were to travel there on my own, I wouldn't even know how to navigate beyond the airport.
When traveling through Japan, I got to see and admire how beautiful the girls and women there look in their traditional kimonos.
I started this crochet pattern by doing a bit of research on kimonos and found that there are so many different types. Some are more formal than others.
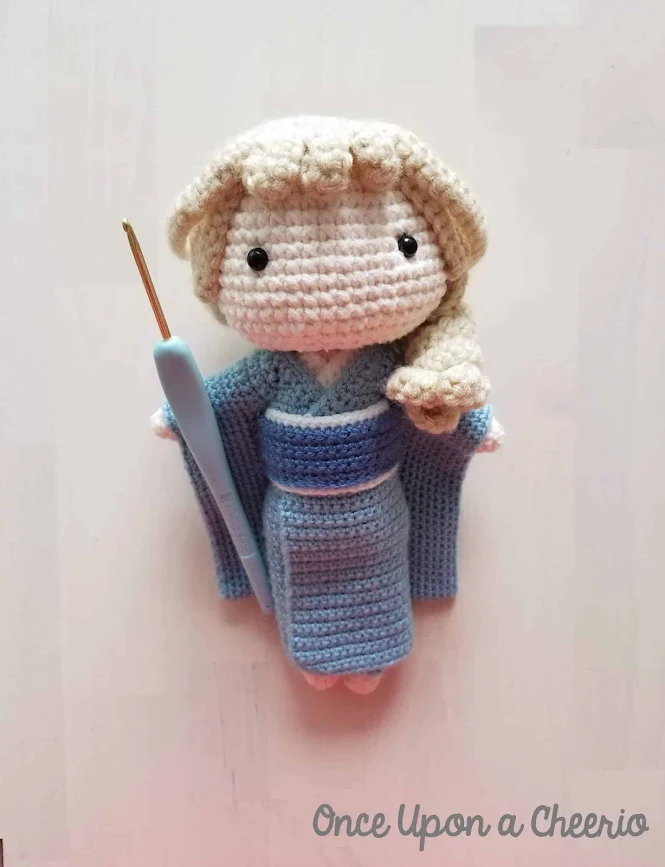
This crochet kimono outfit for my Mini Mimi doll was one of my more challenging pieces to design, but I very much enjoyed the process because of how excited I was to see it come to life.

I have two yukatas that I bought from Japan. Yukatas are lightweight. They're lightweight and typically made using cotton and are typically worn during summer festivals. Although they're informal, they're one of the most popular Japanese kimonos.
Furisode kimonos are my favorite. They're the most formal types of kimonos that you see people wear at special events. They have dramatically long sleeves with beautiful and eye-catching designs.
While this crochet kimono may look like a yukata because it's simple and all one-color, some embroidery to the bottom of the sleeves and bodice of the kimono will make it look like a next-level furisode.

The crochet kimono's main piece is created all in one piece with no sewing (except for closing off the sides of the sleeves). If you've made any of my crochet patterns, you know how much I hate sewing my pieces together, so whenever possible, I try to crochet everything in one piece.
Aside from the main crochet kimono piece, there's also the big wide belt (obi/obiage) along with a decorative bow that sits at the back that finishes off the piece nicely.
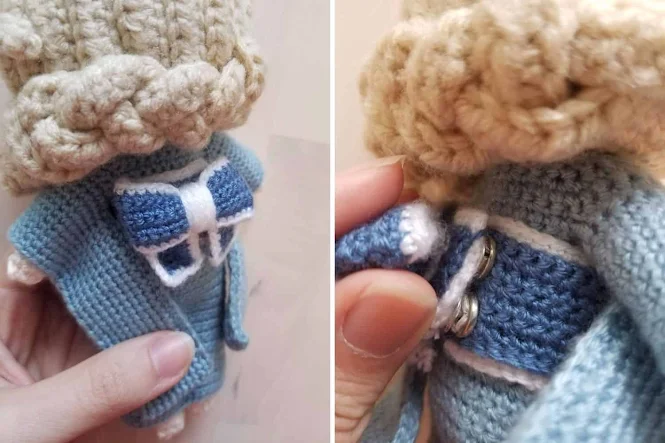
This time, instead of using hook and eye fasteners like I did with my healthcare hero amigurumi doll, I decided to try using snap buttons to fasten the outfit together.
Remember to like Once Upon a Cheerio on Facebook. I'd also love it if you followed @onceuponacheerio on Instagram!
Don't have time to make it right this instant? Pin it for later!
Japanese Amigurumi Kimono Doll FREE Crochet Pattern
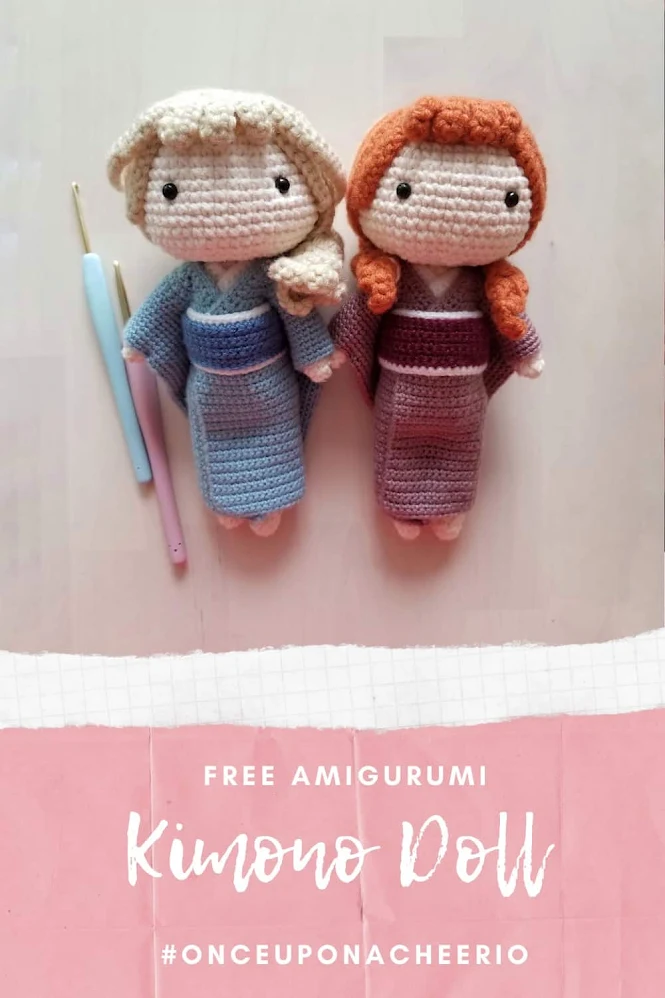
If you are looking to purchase the ad-free PDF crochet pattern for the Mini Mimi Amigurumi Doll, you can visit my Ravelry store.
What You Need / Materials
Most of these items can be purchased through our affiliate links. Purchasing items through these links will not cost you any extra money. Please see our disclosure policy for more details.- Mini Mimi Doll
- Superfine (Weight 1) Yarn (Loops and Threads' Woolike yarn) in two contrasting colors:
- Color A (I used Woolike yarn in Ice Blue)
- Color B (I used Woolike yarn in Denim Blue)
- Color C (I used Woolike yarn in White)
- 2.5 mm Crochet Hook
- Hook and Eye Fasteners or small Snap Buttons
- Yarn Needle
- Stitch Markers
- Scissors
Stitches & Abbreviations
- st/sts - stitch/stitches
- ch - chain
- slst - slip stitch
- sc - single crochet
- sc inc - single crochet increase, 2 single crochet in one stitch
Notes
- This crochet pattern is written in US crochet terms.
- This crochet pattern is just for the kimono outfit. To find the crochet pattern for the doll, please visit my Mini Mimi CAL.
- The crochet pattern does not include any shoes (geta) or kimono drawstring purses (fuguro).
- The chain at the beginning of the row does not count as a stitch.
Crochet Kimono Pattern
Using a 2.5 mm crochet hook with superfine yarn in color A...
Ch 24
Row 1: Sc into the second ch from the hook, sc inc, sc 5, sc inc, sc 7, sc inc, sc 5, sc inc, sc (27 sts)
Row 2: Ch 1, turn, sc inc 3, sc 5, sc inc 2, sc 7, sc inc 2, sc 5, sc inc 3 (37 sts)
Row 3: Ch 1, turn, sc inc, sc 35, sc inc (39 sts)
Shaping the armholes...
Row 4: Ch 1, turn, sc inc, sc 3, ch 5, skip 10 sts, sc 11, ch 5, skip 10 sts, sc 3, sc inc (31 sts)
Row 5: Ch 1, turn, sc inc, sc 29, sc inc (33 sts)
Row 6: Ch 1, turn, sc inc, sc 31, sc inc (35 sts)
Row 7: Ch 1, turn, sc inc, sc 33, sc inc (37 sts)
Row 8: Ch 1, turn, sc inc, sc 35, sc inc (39 sts)
Row 9: Ch 1, turn, sc inc, sc 37, sc inc (41 sts)
Row 10: Ch 1, turn, sc inc, sc 39, sc inc (43 sts)
Row 11: Ch 1, turn, sc inc, sc 41, sc inc (45 sts)
Do NOT cut the yarn...
Collar
Collar Row 1: Ch 1, sc up the edges from rows 11 to 1 (11 sts), sc across the neckline (23 sts), and then sc down rows 1-11 (11 sts) (Total= 45 sts)
Collar Row 2: Ch 1, turn, sc across into each st of the collar you just made (45 sts)

...Without cutting the yarn, continue making the rest of the body of the kimono
Row 12: Ch 1, sc 2 along the bottom edge of the collar, sc 45 in each st across, then sc 2 along the bottom edges of the other side of the collar (49 sts)
Row 13-44: Ch 1, turn, sc into each st across (45 sts)
Cut and fasten yarn.
Sleeves (x2)
Using a 2.5 mm crochet hook with superfine yarn in color A, make a standing sc starting from the bottom and center of the armhole...
Row 1: Sc 15 around the armhole (15 sts)
Row 2: Ch 1, turn, sc 15 (15 sts)
Row 3: Ch 1, turn, sc 15, Ch 50, begin to work in rounds instead of rows
Round 4-12: Sc 65 (65 sts)
Cut and fasten yarn leaving a long tail to sew the sides of the sleeve together. From the stitch, you left off, skip 15 sts for the hand to come through and start sewing down the sleeve from there. Then, thread the yarn to the other side and sew together the other side of the sleeve and then towards the underarm.

Crochet Obi Pattern
Obiage
Using a 2.5 mm crochet hook with superfine yarn in color C...
Ch 46
Rows 1: Sc into the second ch from the hook, then sc 44 across (45 sts)
Row 2-10: Ch 1, turn, sc into each st across (45 sts)
Obi
Using a 2.5 mm crochet hook with superfine yarn in color B...
Row 1: Slst into the last row of the obiage in each st across (45 sts)
Row 2: Ch 1, turn, sc into the BLO in each slst across (45 sts)
Row 3-7: Ch 1, turn, sc into each st across (45 sts)
Row 8: Fold down the obi and then slst into the first row of the obiage in each st across (45 sts)
Decorative Bow
Using a 2.5 mm crochet hook with superfine yarn in color B...
Ch 41
Row 1: Sc into the second ch from the hook and then sc 39 across (40 sts)
Row 2-8: Ch 1, turn, sc into each st across (40 sts)
Change to color C...
Sc around the decorative bow piece, 3 sc stitches at each corner, and 1 sc on the edge of each row.
Continue to make the bow following the below diagram and attach it to the Obi:

Crochet Haneri Pattern
Using a 2.5 mm crochet hook with superfine yarn in color C...
Ch 41
Row 1: Sc into the second ch from the hook, then sc into each st across (40 sts)
Row 3-4: Ch 1, turn, sc into each st across (40 sts)
Assembly
Wrap the Haneri piece around your Mini Mimi doll's neck to create a V-neck and wrap the ends around the doll's waist. The ends won't show once you dress them in their crochet Kimono.
The Haneri piece gives the illusion that there are multiple layers to the Kimono.
Dress your Mini Mimi doll in the crochet kimono. The Kimono should be snug around the body.
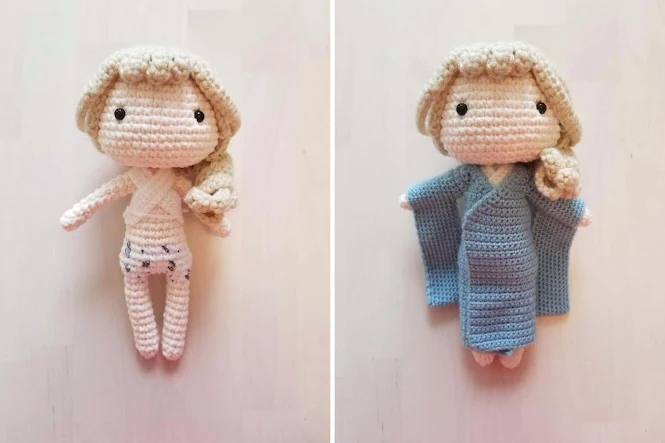
Put some snap buttons or hook/eye fasteners on both ends of the obi/obiage to close it when wrapped around the crochet kimono.

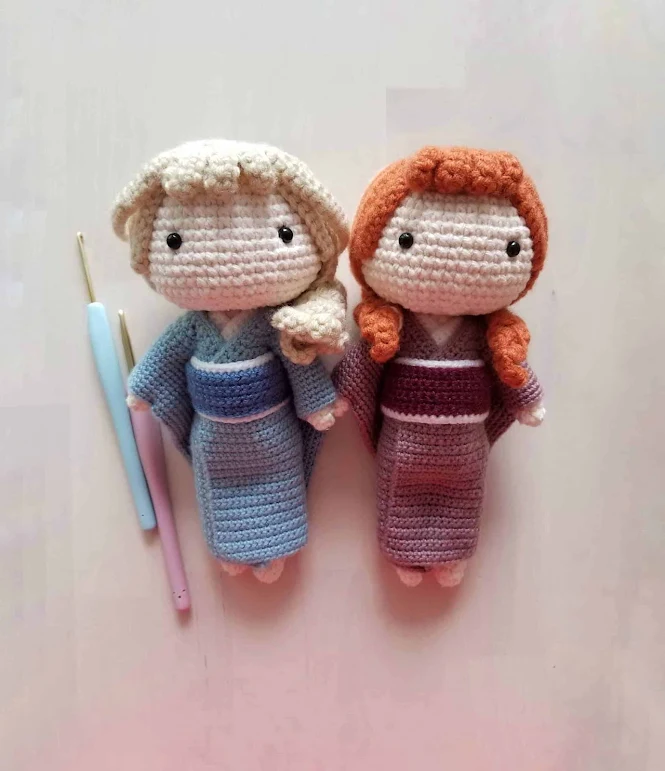
And there you go! Your completed crochet Kimono outfit for Mini Mimi.
Did you make your own crochet kimono outfit for your Mini Mimi doll? I'd love to see it! Please share it with me on Instagram and/or use the #onceuponacheerio hashtag.
This is an original crochet pattern written by Juli Anne of Once Upon a Cheerio. Please do not claim this crochet pattern as your own. If you wish to share this crochet pattern, you may link to this blog post but please do not reprint it on your site. You may keep a copy for personal use but please DO NOT sell or distribute the crochet pattern.
You may sell products made from this crochet pattern, but please clearly credit the design to me, Juli Anne of Once Upon a Cheerio and provide a link to my blog www.OnceUponaCheerio.com. Permission is NOT granted for mass production or factory manufacturing of any kind. Thank you for understanding!
You may sell products made from this crochet pattern, but please clearly credit the design to me, Juli Anne of Once Upon a Cheerio and provide a link to my blog www.OnceUponaCheerio.com. Permission is NOT granted for mass production or factory manufacturing of any kind. Thank you for understanding!


This is adorable! I have been looking for crocheted dolls that can be customized and given many different outfits. I wanted to make a *Me* and *My Sister* as dolls to give our mother (She's 76 and having a Bad Year.) This doll seems perfect. Thank you so very much for sharing this pattern for kimono, which will be one of many outfits they will end up with.
That sounds really sweet!! Please share it with me on Instagram or Facebook when you finish! ❤️
Post a Comment