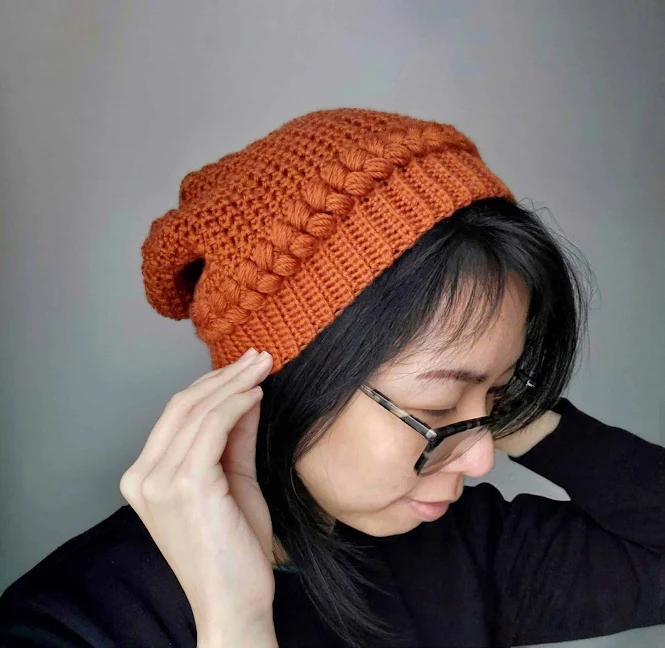
The idea for this crochet beanie has been on my mind for as long as this blog existed. I'm so glad that I finally have the opportunity to complete this beanie design and bring it to life.
I've been wanting to make more fun wearables like my Rapunzel's Braided Scarf and the Sailor Moon Beanie that I've recently published.
If you've been following me on my blog and Instagram for a while, you'd know that I have two girls. So of course, Frozen is a part of our lives.
This Coronation Day crochet beanie was inspired by the hairstyle that Princess Anna wore for Elsa's coronation day (from the first Frozen movie). She wore a braid that goes around the top of her head like a headband and I think that was what drove this design.

There were many crochet techniques that I could have used to accomplish the braided look, like crochet cables. But in the end, I decided to settle on using a slanted crochet puff stitch. It's an easier stitch to learn, which makes this project great for beginners.
I personally love slouchy beanies. I made one a few years ago and it's been my go-to beanie every winter since. So I decided to make the Coronation Beanie a slouchy beanie so that it would become my new go-to beanie.
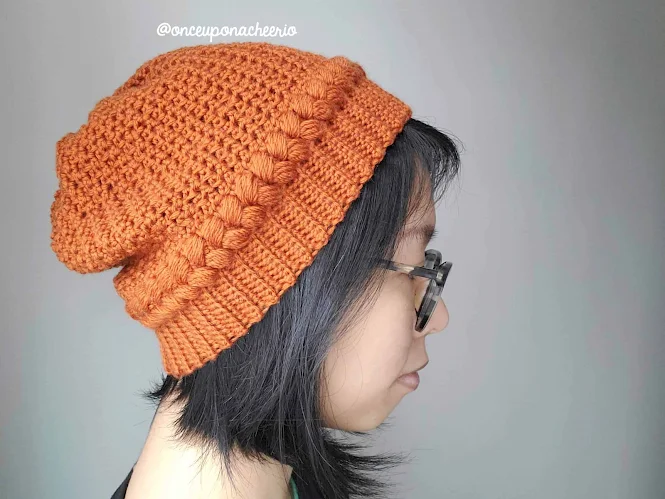
After we moved into our new house in mid-December, it took me a long time to bring my yarn out again because I'd been trying to organize everything else first. The house is a work in progress, but in the meantime, I've brought out a couple boxes of my yarn and managed to whip up this crochet beanie pattern.
I'm also really glad that there are many blank walls for me to take photos with right now because that was a real challenge back when we lived in the condo. This new house is slowly feeling more and more like home. 🏠

For this beanie, I decided to use WeCrochet's Swish DK yarn in All Spice. The yarn is 100% Fine Superwash Merino Wool. DK yarn is thinner than what I normally use, but it worked out well because it made the beanie not as thick/bulky. The yarn was lightweight but very warm and soft to the touch.
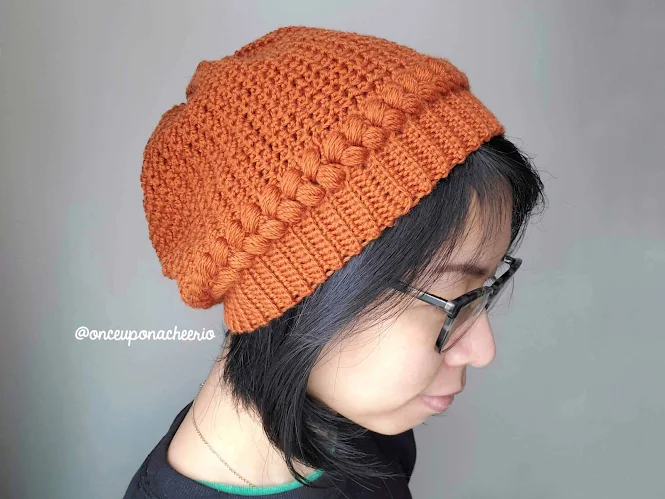
I had only ordered 2 skeins of yarn and I end up using every bit of the 2 skeins with no leftovers at all. I probably would have liked to have one extra skein on hand just so had the option of making a slouchier beanie if I wanted to.
But luckily, the length of the final beanie worked fine for me and I didn't have to end up with any leftovers, which was a bonus!
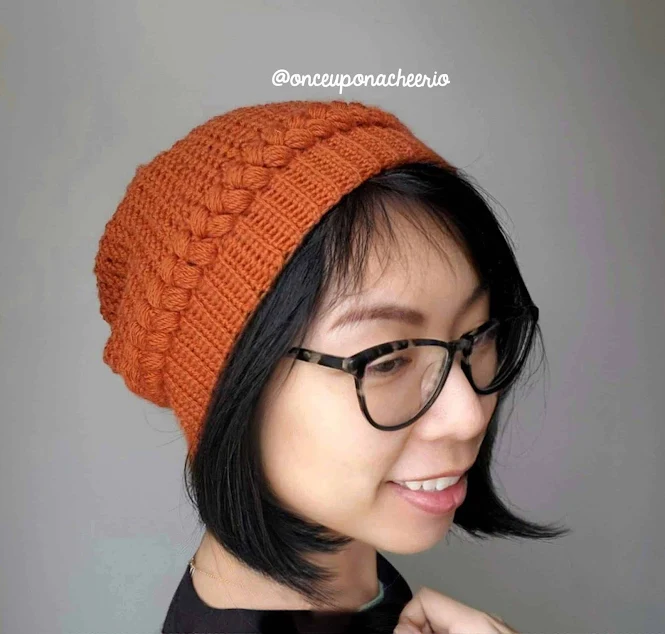
Just as I was finishing up my beanie and trying it on, BB already wanted to claim it as hers. You can find the free crochet pattern below to make your own Coronation Day Beanie!
Remember to like Once Upon a Cheerio on Facebook. I'd also love it if you followed @onceuponacheerio on Instagram!
Don't have time to make it right this instant? Pin it for later!
Coronation Day Slouchy Beanie Crochet Pattern
This crochet pattern is available for FREE on this website. If you'd like an ad-free, printable PDF version, you can purchase it for a small fee from my Ravelry shop.
What You Need / Materials
Most of these items can be purchased through our affiliate links. Purchasing items through these links will not cost you any extra money. Please see our disclosure policy for more details.
- DK Weight Yarn (I used exactly 2 skeins of WeCrochet's Swish DK in All Spice, but I would probably get 1 more just in case you would like it slouchier than mine)
- 4.0 mm Crochet Hook
- 5.0 mm Crochet Hook
- Yarn Needle
- Stitch Markers
- Scissors
Stitches & Abbreviations
- st/sts - stitch/stitches
- ch - chain
- slst - slip stitch
- sc - single crochet
- esc - extended single crochet
- Insert the hook into the indicated stitch. YO and draw a loop through the fabric. YO and draw through the first loop only, forming a chain. YO and draw through both loops on the hook.
- dc - double crochet
- puff st - puff stitch
- [YO and insert hook into the indicated st. Draw up a loop through the fabric] x repeat 5 times. YO and pull through all the loops on the hook. Ch to lock the puff st in place.
- BLO - back loop only
- FLO - front loop only
Notes
- The beanie is worked bottom-up.
- Ribbing gauge: 21 rows of sc BLO = 4" (10 cm)
- Beanie gauge: 17 esc x 15 rows = 4" x 4" (10 cm x 10 cm)
- This crochet pattern will make a beanie that fits an adult with a head circumference size of 21".
- You can adjust the size of the beanie as you'd like by increasing the number of rows of ribbing by multiples of 2.
- I used exactly 2 skeins of WeCrochet's Swish DK, but I would get 3 skeins just in case you want to make any adjustments (e.g. slouchier beanie).
- This crochet pattern is available for FREE on this website. If you'd like an ad-free, printable PDF version, you can purchase it for a small fee from my Ravelry shop.
Free Crochet Pattern
Ribbing
With a 4.0 mm crochet hook...
Row 1: Ch 11, sc into the second st from the hook, then sc up the ch (10 sts)
Row 2-90: Ch 1, turn, sc BLO across in each st (10 sts)
When finished, sc the BLO of the last row to the starting chain (10 sts) to make a loop. Make sure it's not twisted. [pic 1]
Braided Puff Stitches
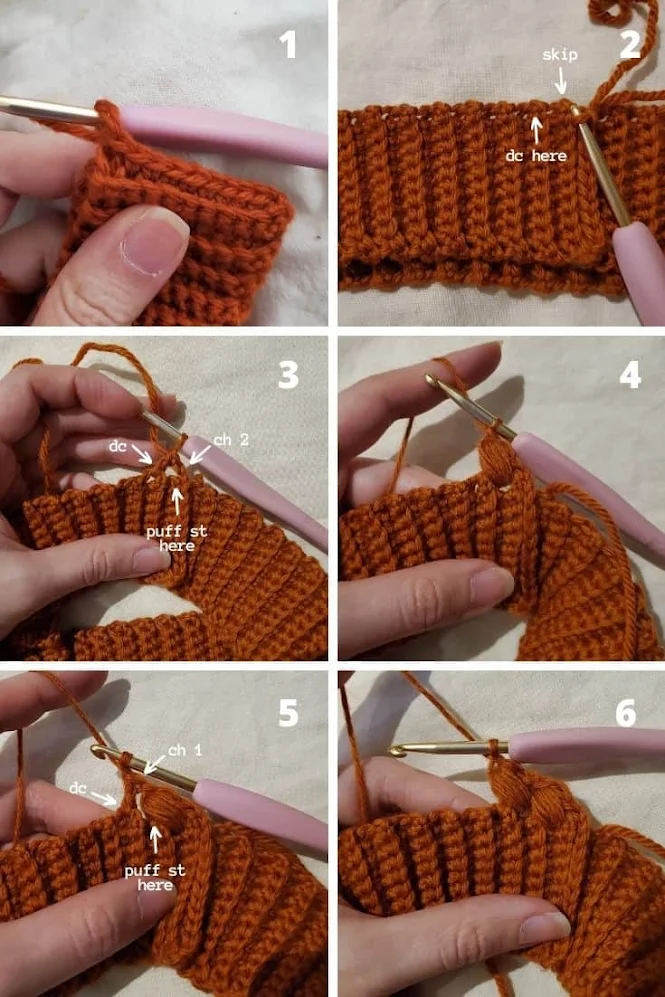
Turn your work to work on the edges of the ribbing. Start working on the "wrong side" (the side where you joined the ribbing together).
We will be working into every other stitch, and I suggest working on the sturdier edge stitch so it won't stretch as much.
Row 1: Ch 2, skip the first turning ch, dc into the second turning ch [pic 3]. Ch again and go back and make a puff st on the first turning ch that you skipped [pic 4]. [Then, dc into the next turning ch. Ch again and go back and make a puff st on the same st as the previous dc [pic 5]] x repeat until the end of the round. Make the last dc into the first puff st [pic 8] in the row and another puff st on the same st as the previous dc [pic 9]. Then slst to the top of the turning ch to join the row [pic 10] (45 puff sts).

In the next round, the dc and puff sts will be worked in the gap between the puff stitches.
Row 2: Ch 2, turn (working on the right side of the beanie) skip the first puff st, and dc into the gap between the first and second puff [pic 11]. Ch again and go back and make a puff st where you made the turning ch [pic 12]. [Then, dc into the next gap [pic 13]. Ch again and go back and make a puff st in the same gap as the previous dc] x repeat until the end of the round. Make the last dc into the first puff st in the row and another puff st on the same gap as the previous dc. Then slst to the top of the turning ch to join the row [pic 14] (45 puff sts).

Beanie
Work along the top of the puff sts [there are 2 sts above each puff st - see pic below] and change to a 5.0 mm crochet hook...
Round 1: Ch 1, without turning work 2 esc on top of each puff st (90 sts)
Round 2-25: Without joining, continue working in the round, [esc FLO, esc BLO] x repeat until the end of the round (90 sts)

You can choose to increase or decrease the number of times you repeat round 2 to achieve the desired length of the beanie if you want it more/less slouchy.
Assembly
Use a yarn needle to sew up the top of the beanie close. Fold the beanie in half and stitch the middle together to make an 8-figure. Pinch the sides of the 8-figure and make another stitch. Repeat this step by pinching the openings and then sewing them together until the top of the beanie is all closed.
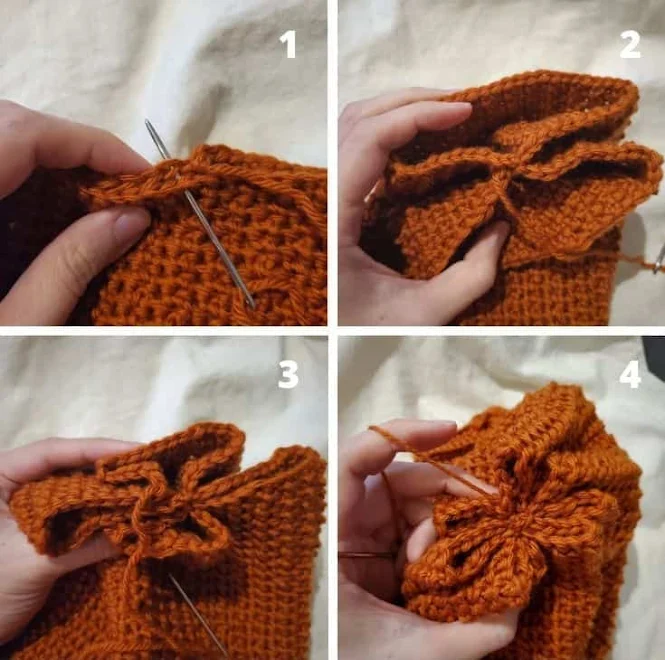
In the end, your beanie should look something similar to this:

Did you make your own Coronation Day Beanie? I'd love to see it! Please share it with me on Instagram and/or use the #onceuponacheerio hashtag.
This is an original crochet pattern written by Juli Anne of Once Upon a Cheerio. Please do not claim this crochet pattern as your own. If you wish to share this crochet pattern, you may link to this blog post but please do not reprint it on your site. You may keep a copy for personal use but please DO NOT sell or distribute the crochet pattern.
You may sell products made from this crochet pattern, but please clearly credit the design to me, Juli Anne of Once Upon a Cheerio and provide a link to my blog www.OnceUponaCheerio.com. Permission is NOT granted for mass production or factory manufacturing of any kind. Thank you for understanding!

