Happy New Year and Chinese New Year is just around the corner! Bring good luck and prosperity to your home with our Chinese Lucky Candy Pillow Crochet Pattern. In our family, the Lunar New Year is just as big of a deal as Christmas! It's earlier than normal this year and it's particularly special this year because it's the Year of the Rabbit!
One of the most iconic treats during the largest Chinese holiday is the Chinese Lucky Candy, which we call Lai See Tong (利是糖) in Cantonese.
Lai See (利是) is actually the red pocket envelope filled with money that people receive during Chinese New Year. But you can actually receive red pockets at any time of the year like birthdays, graduation, weddings, etc. It's a way for Chinese people to wish each other good luck!
These Chinese Lucky Candy are actually sweet strawberry-flavored hard candies wrapped in shiny red wrappers with the Chinese characters (利是) on the front.
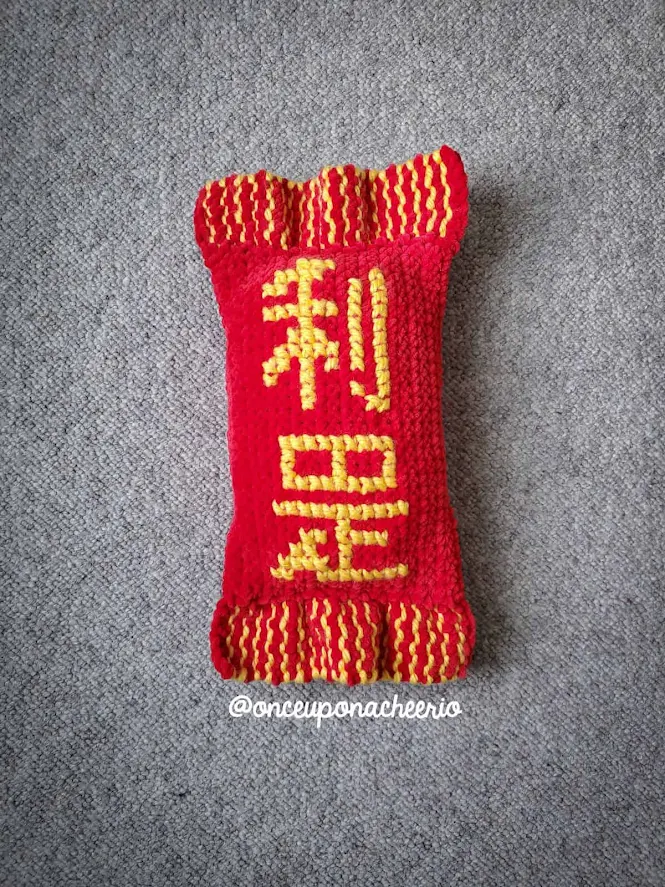
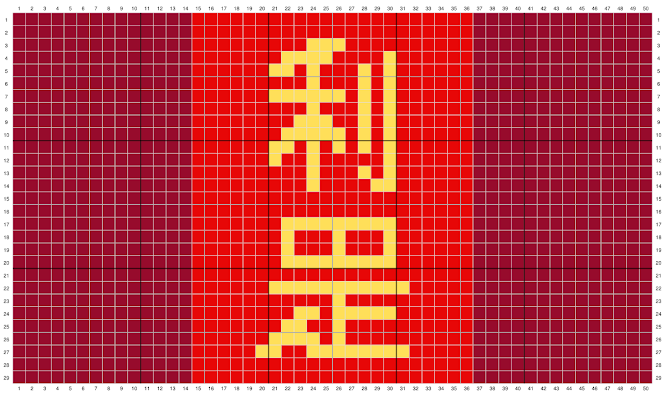
As I was cross-stitching the Chinese characters onto the front of this candy, I realized that the second character on the candy is different from how it's traditionally written (是). The stroke inside the box is horizontal, but on the candy, it's vertical...?
I wanted to stay true to the traditional iconic candy, so I stuck with the vertical stroke. I already had a couple of my friends point out that I wrote it wrong.
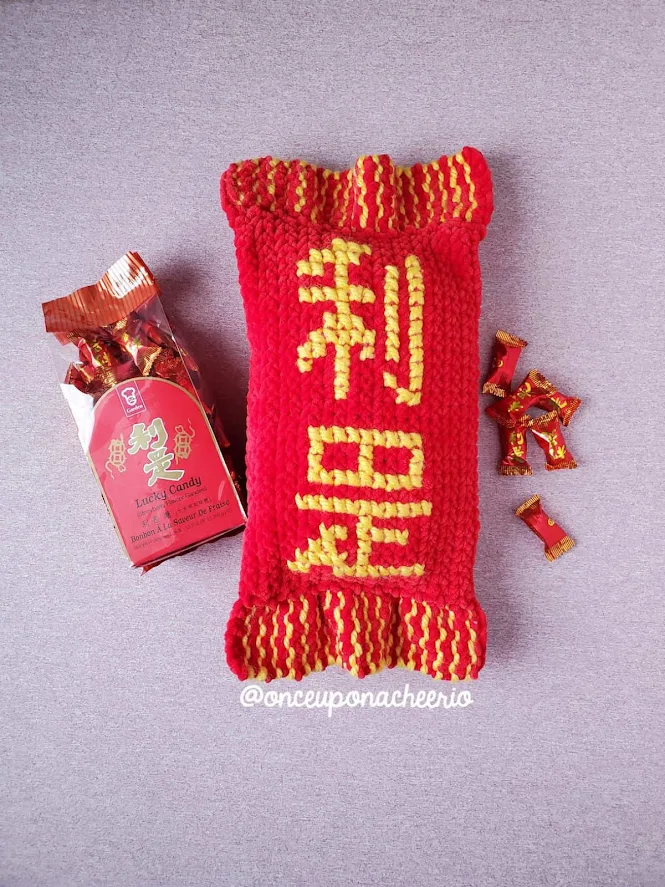
I asked my dad about it. I thought there might be some kind of background story to the candy, but all he said was that the company probably wanted to trademark it and purposely wrote it that way. We're not 100% sure. So if you know the background story to this traditional Chinese candy, drop me a comment down below!

The next part I wanted to talk about was the yarn I used for this project. I knew I wanted it to be pillow-sized, so I chose to use Hobbii's Baby Snuggle and Honey Bunny, which is a bulky velvet yarn. For the most part, these two yarns feel and crochet the same way, so I would consider them to be interchangeable.
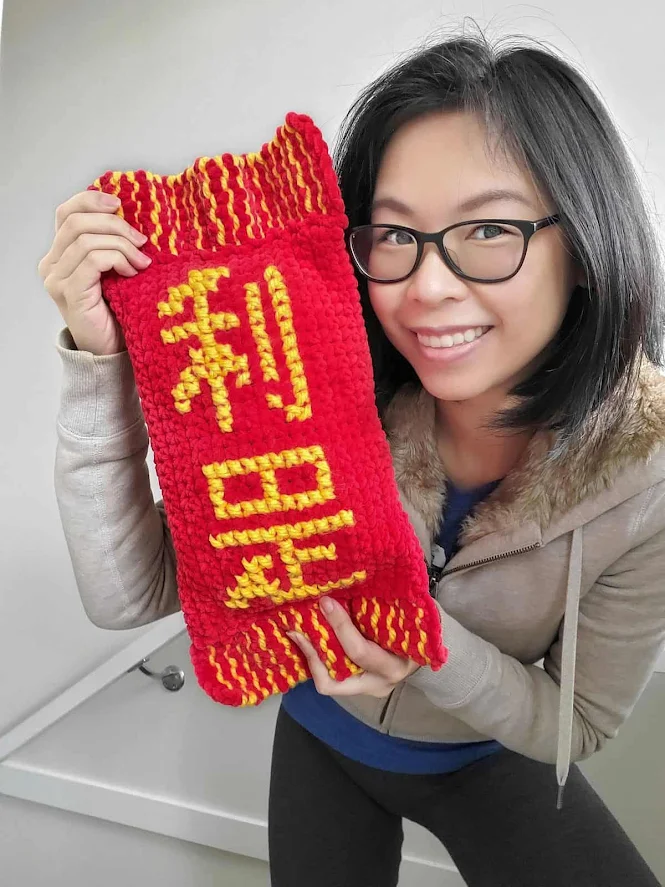
While this yarn is super soft, plush, and easy on the hands, you really need to know your design before you start because this yarn is not very forgiving if you ever have to frog/disassemble it because it would shed and fall apart. It's not really a yarn you use to design with but once you complete your project, the fur is locked in and shedding is not an issue anymore.
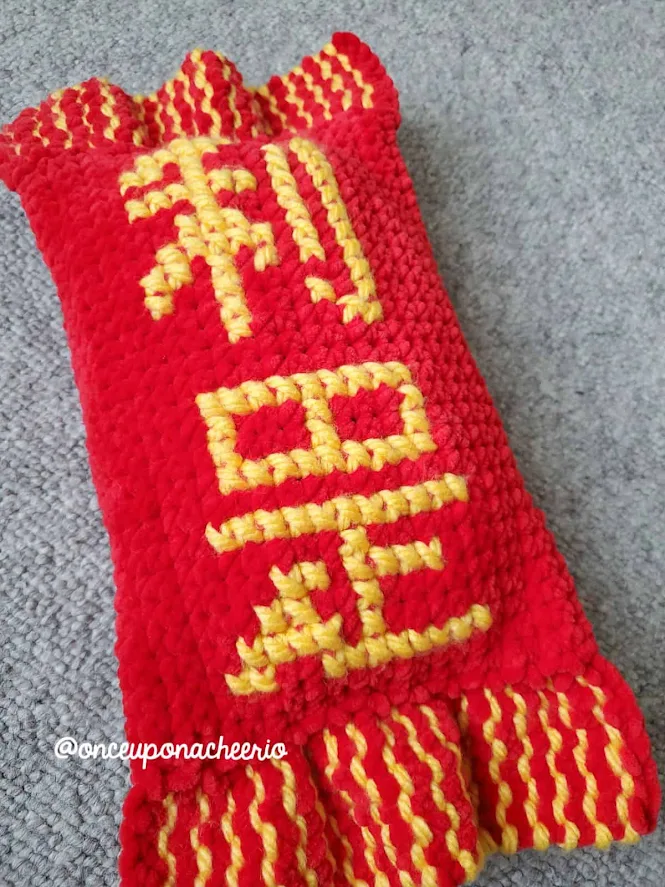
I initially tried cross-stitching with this velvet yarn, but I didn't love it. The yarn is so light and fluffy that tension became a real issue. If you pulled too tight, the stitches end up getting embedded and aren't well-defined. I solved this problem by using the Amigo Giga (a bulky-weight acrylic yarn) for the cross-stitching instead.
I hope you love this project as much as I do (Mui Mui wanted to sleep with it the night I finished it)! The cutest part of this project is that the candy pillow comes out of its wrapper!
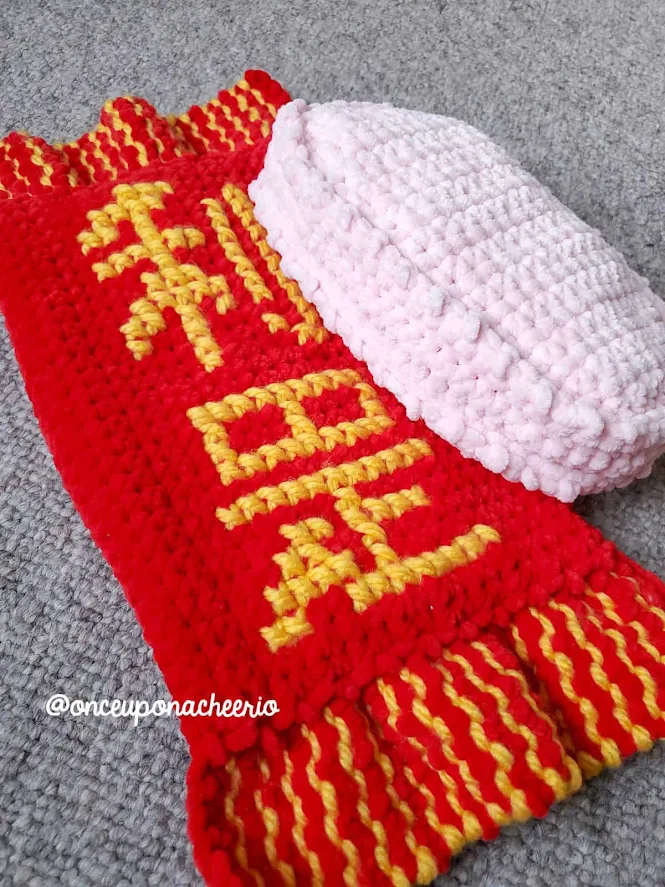
The crochet pattern is easy to follow, making it fun and satisfying for beginners and experienced crocheters alike. Get your hands on this Chinese Lucky Candy pillow crochet pattern today and start stitching your way to good luck and prosperity!
Do you have a favorite Chinese New Year tradition? Share it with me in the comments below!
Remember to like Once Upon a Cheerio on Facebook. I'd also love it if you followed @onceuponacheerio on Instagram!
Don't have time to make it right this instant? Pin it for later!
What You Need / Materials
Most of these items can be purchased through our affiliate links. Purchasing items through these links will not cost you any extra money. Please see our disclosure policy for more details.- Chenille/Blanket Yarn in the following colors:
- Red (I used 2x Hobbii's Baby Snuggle in Red)
- Pink (I used 1x Hobbii's Honey Bunny in Hint of Pink)
- Bulky Weight Yarn in the following colors:
- Yellow (I used 1x Hobbii's Amigo Giga in Sunflower)
- 8.0 mm Crochet Hook
- Poly-fil or any Polyester Stuffing of your choice
- Yarn Needle
- Stitch Markers
- Scissors
Stitches & Abbreviations
- ch - chain
- slst - slip stitch
- sc - single crochet
- sc inc - single crochet increase, 2 single crochets in one stitch
- sc dec - single crochet decrease, single crochet 2 stitches together
Notes
- Work along the back bumps of the foundation chain for neater stitches.
- Follow the tutorial on cross-stitching on single crochet for you to cross-stitch the Chinese characters onto your crocheted candy wrapper.
- The turning chain does not count as a stitch.
- Finished size: 42 cm x 17.5 cm (16.5" x 7")
- Gauge: 10 cm x 10 cm (4" x 4") = 12 sc sts x 12 rows
Lai See Candy Pillow Crochet Pattern
Candy Wrapper
Using an 8.0 mm crochet hook and red yarn...
Ch 31
Row 1: Sc in the second loop from the hook and in every stitch across (30 sts)
Row 2-50: Sc in each st across (30 sts)
Before we cut and fasten...
Make a row of slst in each st across (30 sts). This is used to reinforce the last row so that it doesn't stretch from all the playing when you take the candy pillow in and out of the wrapper!
The wrapper piece was crocheted on its side (portrait orientation), so we will turn it to its side so that it will look like the picture below (landscape orientation).
Use yellow yarn to cross-stitch the Chinese characters as indicated in the diagram below:
Candy Wrapper Edges (x2)
Using an 8.0 mm crochet hook and red yarn...
Ch 9
Row 1: Sc into the second loop from the hook, sc in each st across (8 sts)
Row 2-21: Sc in each st across (8 sts)
Cut and fasten off.
Use yellow yarn and a yarn needle to weave the yellow stripes into the wrapper edges.
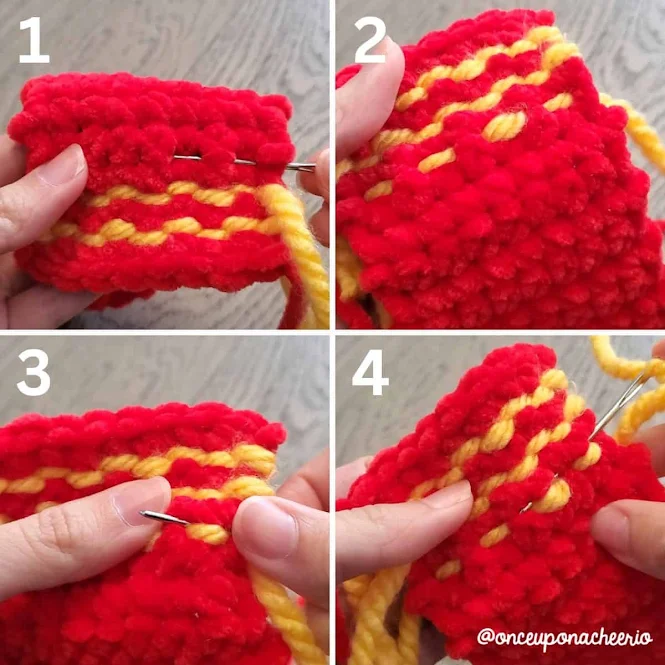
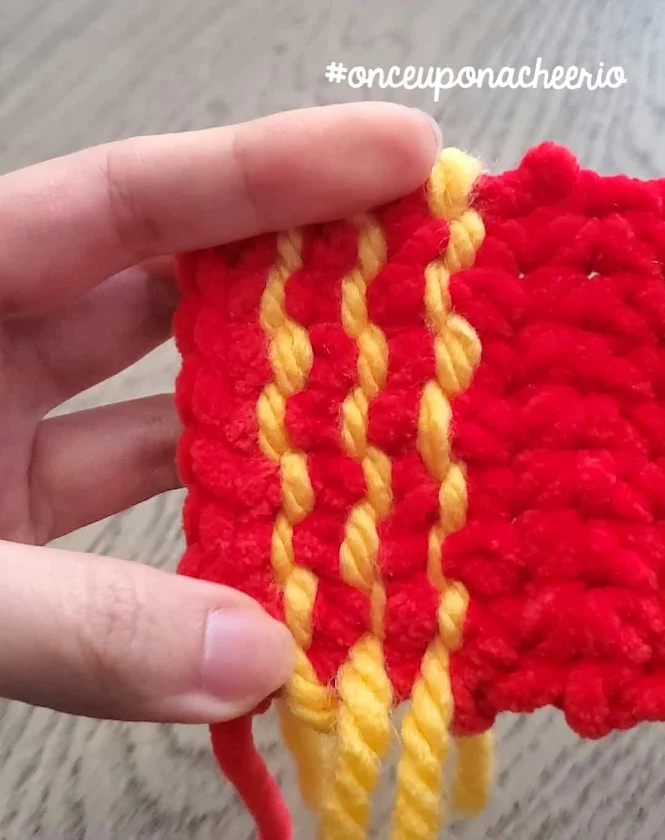
Do this across the whole crochet candy wrapper edge.
Candy Pillow
Sides (x2)
Using an 8.0 mm crochet hook and pink yarn...
Ch 10
Row 1: Sc into the second loop from the hook, sc in each st across (9 sts)
Row 2: Ch 1, turn, sc inc, 7 sc, sc inc (11 sts)
Row 3: Ch 1, turn, sc inc, 9 sc, sc inc (13 sts)
Row 4: Ch 1, turn, sc inc, 11 sc, sc inc (15 sts)
Row 5-23: Ch 1, turn, sc in each st across (15 sts)
Row 24: Ch 1, turn, sc dec, 11 sc, sc dec (13 sts)
Row 25: Ch 1, turn, sc dec, 9 sc, sc dec (11 sts)
Row 26: Ch 1, turn, sc dec, 7 sc, sc dec (9 sts)
Edging
Using an 8.0 mm crochet hook and pink yarn...
Ch 69
Row 1: Sc into the second loop from the hook, sc in each st across (68 sts)
Row 2-3: Ch 1, turn, sc in each st across (68 sts)
Do NOT cut.
Assembly
Candy Wrapper Assembly
Fold in the area indicated as dark red in the diagram above. Note that the flaps will overlap.
Use a yarn needle and red yarn to sew it together, sandwiching the candy wrapper edges in the middle to hide the rough edges.
This will create a pocket opening for the candy pillow.
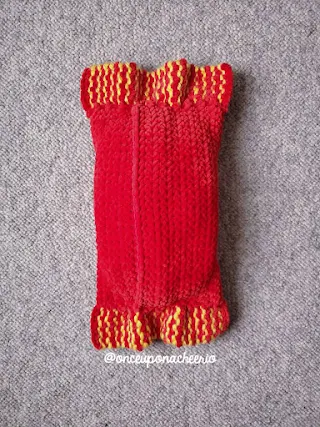

Candy Pillow Assembly
When you finish crocheting the edge of the pillow, do not cut. Continue by slip-stitching along the sides of the candy pillow to the edging.
Remember to stuff your pillow with poly-fil and polyester stuffing before you close it!
And there you have it! Your very own Crochet Chinese Lucky Candy Pillow to celebrate Chinese New Year!
Did you crochet your own Lucky Candy Pillow? I'd love to see it! Please share it with me on Instagram and/or use the #onceuponacheerio hashtag.
This is an original crochet pattern written by Juli Anne of Once Upon a Cheerio. Please do not claim this crochet pattern as your own. If you wish to share this crochet pattern, you may link to this blog post, but please do not reprint it on your site. You may keep a copy for personal use, but please DO NOT sell or distribute the crochet pattern.
You may sell products made from this crochet pattern, but please clearly credit the design to me, Juli Anne of Once Upon a Cheerio and provide a link to my blog www.OnceUponaCheerio.com. Permission is NOT granted for mass production or factory manufacturing of any kind. Thank you for understanding!
You may sell products made from this crochet pattern, but please clearly credit the design to me, Juli Anne of Once Upon a Cheerio and provide a link to my blog www.OnceUponaCheerio.com. Permission is NOT granted for mass production or factory manufacturing of any kind. Thank you for understanding!




Hi there,
Followed your instagram and facebook. I am Chinese from Hong Kong.
How about crochet it as a keyring ? XX
Louise
Omg that's genius! I gotta try that! Thanks for the idea! ❤️
Post a Comment