Christmas has always been my favorite time of the year, but Christmas at Disneyland just makes it even more magical. I bought these Mickey and Minnie Mouse Santa hats for Hanson and me at Disneyland around Christmas time back in 2010 when I went on a family trip.
We love these Mickey and Minnie Santa hats. We actually bring them out every year!

Fast forward to many years later where we now have two little girls of our own. They love their daddy and mommy's matching Mickey and Minnie Mouse Santa hats and really wanted one of their own.
So in January of this year, we bought a couple of Santa hats during an after-season sale at Michael's and I promised that I would make them their own Minnie Mouse Santa hat. Well, the time has come for me to carry out that promise.
It was actually great timing because we were actually planning a trip to Disneyland in December! We went to Disneyland last year in June and it was amazing!
When Hanson suggested that we should go again this year, how can I refuse? But I didn't really want to see normal Disneyland again, so I suggested doing Christmas Disneyland instead! I can't wait to update this post with photos from our trip!

Making the crochet Minnie Mouse Santa hat is easy, especially when you have a store-bought Santa hat to start you off. But if you don't there are plenty of crochet patterns for Santa hats on the internet.
You can also make a Mickey Santa hat by omitting the bow!

Aside from the ears and the bow, I felt that it would look better if the Santa hat had a fluffier white trim, so I used some white faux fur yarn to make the nice plush trim. And of course, the pompom at the end of the hat needed to match as well so I crocheted that too!

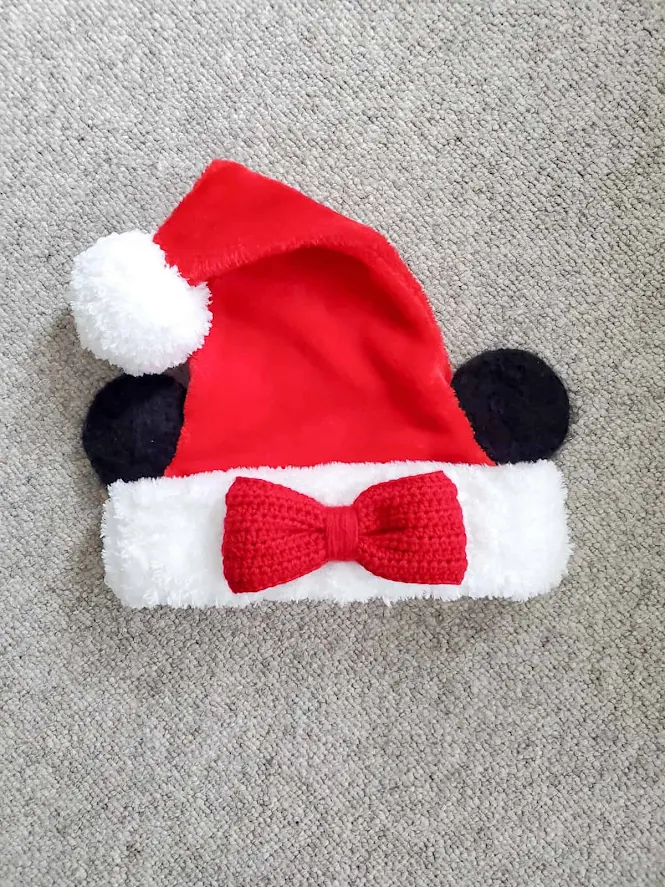
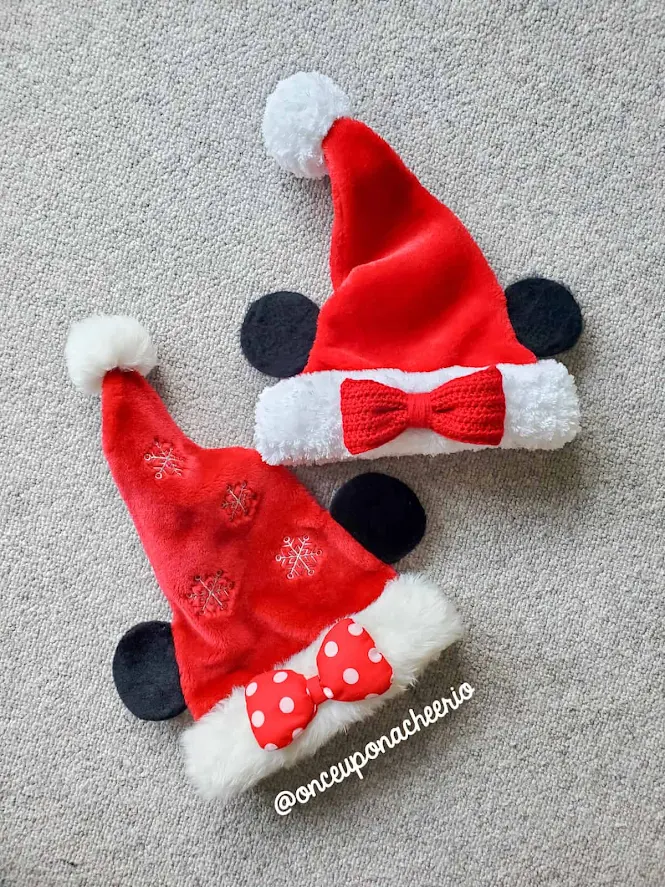
Their Minnie Mouse Santa hat turned out looking SO amazing. Not to brag or anything, but I think it turned out looking better than my store-bought ones and now I'm the jealous one! I'm going to have to make one for myself at some point so I can match the girls.

Oh! And guess what? My cousin was able to join us for one of the days that we were at Disneyland, so I made her a Minnie Mouse Santa hat too!

Remember to like Once Upon a Cheerio on Facebook. I'd also love it if you followed @onceuponacheerio on Instagram!
Don't have time to make it right this instant? Pin it for later!
Mickey and Minnie Santa Hat FREE Crochet Patterns
What You Need / Materials
Most of these items can be purchased through our affiliate links. Purchasing items through these links will not cost you any extra money. Please see our disclosure policy for more details.
- Santa Hat (or make your own!)
- Worsted weight yarn in the following colors:
- Black (try using Brava Worsted in Black)
- Red (try using Brava Worsted in Red)
- Faux fur yarn (optional):
- White (I used Hobbii Peacock in White)
- 4.0 mm Crochet Hook (for Worsted Weight yarn)
- 10 mm Crochet Hook (for Faux Fur yarn)
- Yarn Needle
- Stitch Markers
- Scissors
Stitches & Abbreviations
- st/sts - stitch/stitches
- ch - chain
- slst - slip stitch
- sc - single crochet
- sc inc - single crochet increase, 2 single crochets in one stitch
- sc dec - single crochet decrease, single crochet 2 stitches together
- hdc - half double crochet
- BLO - back loops only
Notes
- The mouse ears are crocheted in 2 pieces and then slip-stitched together. The two pieces crocheted together are stiff enough, no stuffing is required.
- Omit the bow to make it a Mickey Mouse Santa hat.
- The faux fur trim and pompom are optional - I just wanted to make my Santa hat more fluffy.
Free Crochet Pattern
Mouse Ears (make 4)
Using a 4.0 mm crochet hook and black color yarn...
Round 1: Magic Ring with a base of 7 sc (7 sts)
Round 2: Sc inc in each st around (14 sts)
Round 3: [Sc, sc inc] x 7 times (21 sts)
Round 4: [Sc, sc inc, sc] x 7 times (28 sts)
Round 5: [3 sc, sc inc] x 7 times (35 sts)
Round 6: [2 sc, sc inc, 2 sc] x 7 times (42 sts)
Round 7: [5 sc, sc inc] x 7 times (49 sts)
Cut and fasten off.
Place the backs of two pieces together and slst in each st around the edges.
Leave a long tail to sew onto the Santa hat.


I then used a slicker brush to make it furry (as requested by the kids), but this step is optional.
Attach the mouse ears at the seam of the Santa hat (where my finger is pointing).
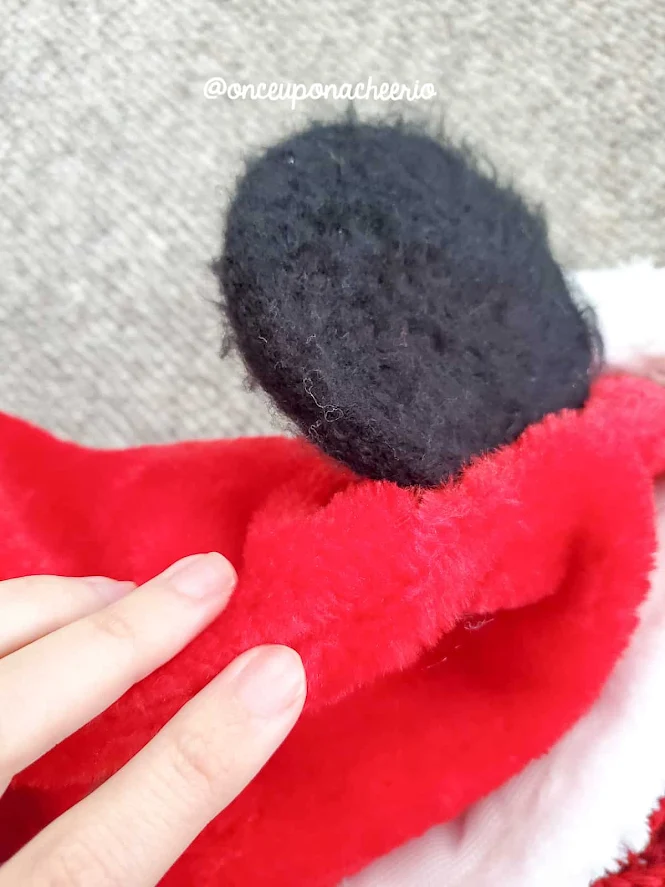
To prevent the ears from flopping around when you shake your head, add a couple of stitches inside the hat (approximately 1 cm) onto the mouse ears circle.

Bow
Using a 4.5 mm crochet hook and red yarn...
Row 1: Ch 57, hdc into the 3rd ch from the hook and in each ch across (55 sts)
Row 2-9: Ch 2, turn, hdc in each st across (55 sts)
Cut and fasten off with a long tail.
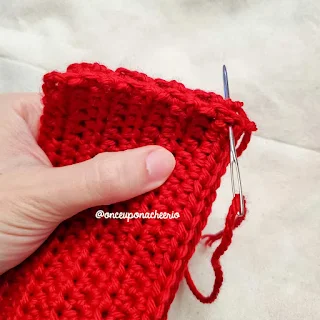
Fold the long rectangle in half lengthwise. Sew the edges together on the wrong side. Then turn the crochet ring inside out so the seam is on the inside. Move the seam to the middle of the bow.

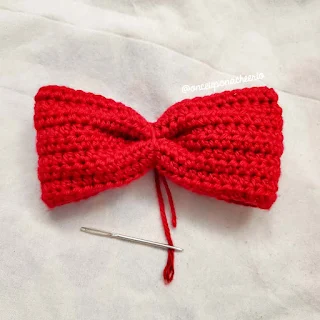
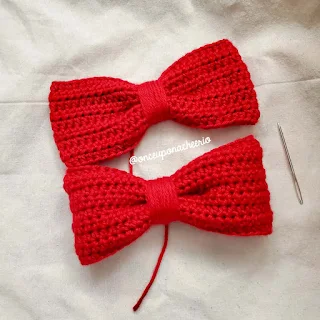
Then use the long tail (or use some more yarn) and wrap yarn around the bow to cinch the middle of the bow. Secure the cinch with a few stitches on the back of the bow, and then sew the bow to the white trim of the Santa hat.
Faux Fur Trim and Pompom (Optional)
I wanted to make the white fur trim of the Santa hat fluffier, so I crocheted a white trim and white pompom using faux fur yarn (Hobbii's Peacock) and sewed it on top of the white part of the Santa hat. I also crocheted a white pompom using the same yarn and stuffed the original pompom from the hat inside so they matched.
Faux Fur Trim
Using a 10 mm crochet hook and white faux fur yarn...
Row 1: Ch 6, sc in the second ch from the hook and in each st across (5 sts)
Row 2-##: Ch 1, turn, sc in each st across (5 sts)
Make it long enough to wrap around the existing white fur trim on the Santa hat.

Faux Fur Pompom
Using a 10 mm crochet hook and white faux fur yarn...
Round 1: Magic circle with a base of 6 sc (6 sts)
Round 2: Sc inc in each st around (12 sts)
Round 3-5: Sc in each st around (12 sts)
Stuff the existing pompom from the Santa hat into the crochet faux fur pom pom.
If the pom pom is not big enough, make another round.
If the existing Santa hat pompom can fit into the crocheted faux fur pompom, cut and fasten off with a tail to close the pompom. Close the faux fur pompom using the ultimate finish (or just weave through each stitch and pull to cinch it close).
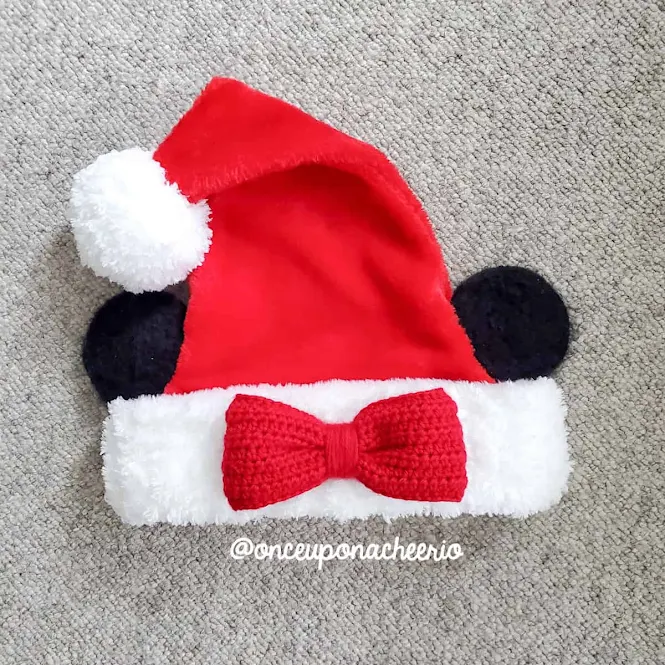
Did you make your own Mouse Ears Santa Hat? I'd love to see it! Please share it with me on Instagram and/or use the #onceuponacheerio hashtag.
This is an original crochet pattern and tutorial written by Juli Anne of Once Upon a Cheerio. Please do not claim this crochet pattern as your own. If you wish to share this crochet pattern, you may link to this blog post but please do not reprint it on your site. You may keep a copy for personal use but please DO NOT sell or distribute the crochet pattern.
Disclaimer: We are not affiliated, associated, authorized, endorsed by, or in any way officially connected with The Walt Disney Company, Disney Enterprises, Inc., or any of its subsidiaries or affiliates. Minnie Mouse is a trademarked character owned by Disney. Please reserve this crochet pattern and the finished product for personal use ONLY.




Post a Comment