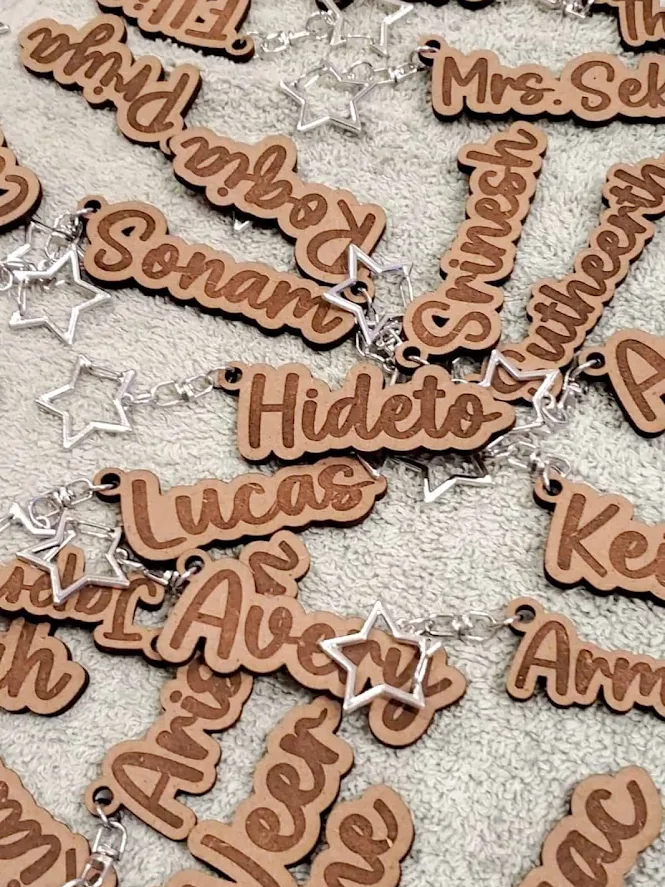
This year, we decided to spread some holiday cheer with handmade personalized name keychains for our kids’ classes! Using the xTool M1—a laser cutter, engraver, and blade cutter—we created unique gifts that added a special touch to the season.
Read my complete xTool M1 review.
This marks the second year in a row that we’ve made handmade gifts for the whole class, and I think it’s safe to say this tradition is here to stay! Last year, we made adorable Mickey and Minnie Mouse rings for the class. Each one was cut out of wood using the laser cutter, then hand-painted, assembled, and packaged.
The xTool makes it extremely easy to create a batch of thoughtful gifts for over 60 kids, without breaking a sweat. As much as I love working with yarn, I'll admit that I am not very fast when it comes to crocheting. So, crocheting 60+ items would likely take me months.
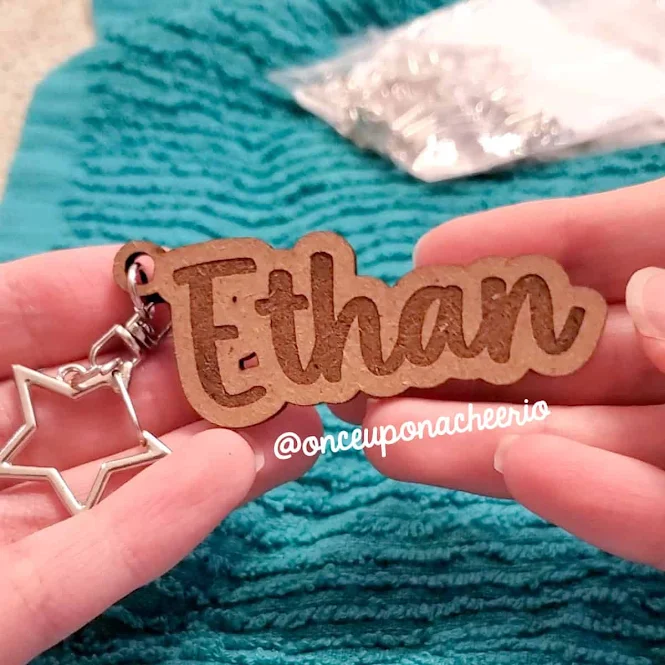
These personalized keychains were quick to make but also allowed us to turn the process into a fun family project. Getting the kids involved was one of the best parts!
The kids helped choose the designs, assembled them, sorted the finished keychains, and even packaged them. Not only did this make the project more manageable, but it also gave the kids a chance to take pride in creating something special for their classmates.
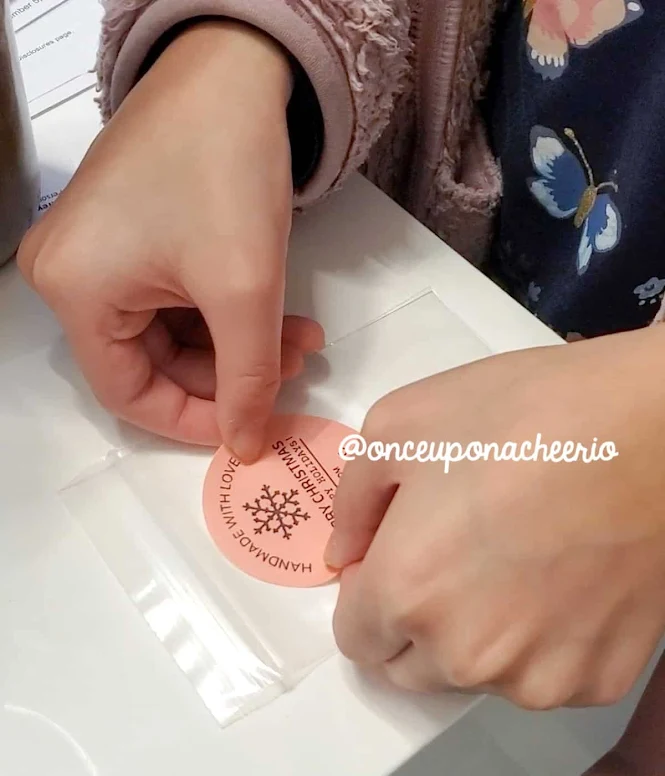
It’s a great way to teach them about thoughtfulness, creativity, and the joy of giving. Plus, seeing their excitement as they helped bring the gifts to life made the experience even more meaningful for all of us.
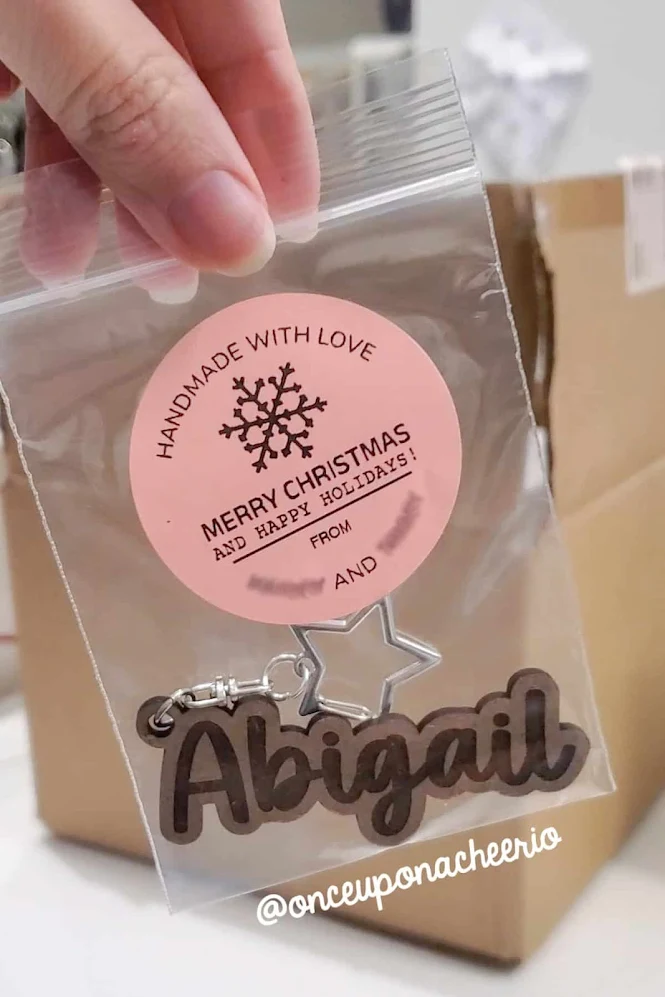
This process wasn’t just about making gifts—it was about sharing quality time and teaching our kids the value of putting effort into something meaningful for others. This tradition of handmade gifts has truly become a highlight of our holiday season, and I hope it inspires others to get creative with their families too!
Remember to like Once Upon a Cheerio on Facebook. I'd also love it if you followed @onceuponacheerio on Instagram!
Don't have time to make it right this instant? Pin it for later!
Personalized Name Keychains using the xTool Creative Space
What You Need / Materials
Most of these items can be purchased through our affiliate links. Purchasing items through these links will not cost you any extra money. Please see our disclosure policy for more details.
- MDF Craft Boards (I found that the engraving comes out better than basswood)
- Fun-Shaped Key Rings
- xTool M1 Smart Laser and Vinyl Cutter
- xTool Creative Space
- Packaging:
Step 1: Choose and Adjust the Font
- Open xTool Creative Space and type the name you want to engrave.
- Choose a font that suits your design.
- I personally prefer handwritten scripts and use a font called Peanut Butter for these keychains.
- Adjust the font size depending on the length of the name (maximum 3 inches):
- For shorter names, use a larger font size to ensure the name stands out.
- For longer names, use a smaller font size to keep the design balanced without making the keychain too large.

(Font size is just for reference, it will be different depending on the font you use.)
Step 2: Add an Outline Around the Name
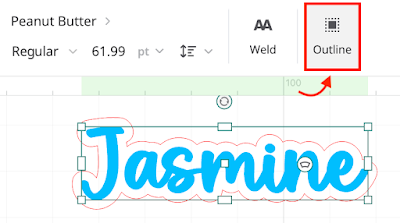
- Once the font size is set, add an outline to the text.
- Most names work well with a 3mm outline for a bold look.
- For longer names with smaller fonts, reduce the outline thickness to 2mm to keep the design proportional.
- Adjust the outline so it neatly frames the name without overwhelming the design.
Step 3: Add a Hole for the Keychain
- Use the shape tool to draw two circles:
- A smaller circle with a 4mm diameter.
- A larger circle with an 8mm diameter.
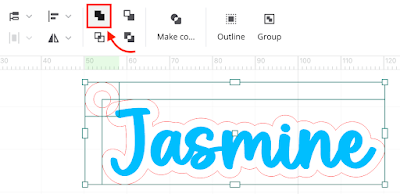
- Align the two circles to overlap and use the “Unite” function to combine them into a single shape.
- Copy and paste the combined circles to the top left corner of each of the outlines created in Step 2. Make sure they overlap.
- Use the “Unite” function again to merge the hole shape with the outline, creating a seamless design for the keychain.
Step 4: Set Up for Engraving and Cutting with the xTool Creative Space
- In xTool Creative Space, set the engraving and cutting parameters:
- Ensure the letters (the name) are set to Engrave.
- Set the outline and keychain hole to Cut.
- Adjust the power and speed settings according to your material (MDF craft board).
- For MDF, these are the settings I used:
- Engrave — Power: 70%; Speed: 175 mm/s; Pass: 1
- Cut — Power: 100%; Speed: 15 mm/s; Pass: 3
- Tweak as needed based on test runs.
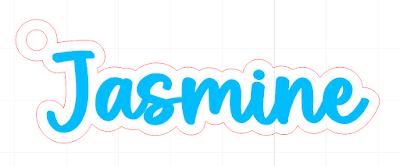
(I used red to identify which lines are to be cut, and blue to identify the engraving)
Step 5: Engrave and Cut using the xTool M1
- Place your MDF craft board on the xTool M1 bed, elevated using the prisms.
- Start the engraving and cutting process and monitor progress to ensure clean cuts and engravings.
- Once complete, carefully remove the keychains from the board and sand any rough edges if necessary.
Step 6: Clean the Edges
- MDF tends to leave black residue around the edges after cutting.
- To clean this, gently scrub the edges and the engraved areas with a toothbrush dipped in warm, soapy water.
- Rinse with clean water and let the keychains air dry completely.
- This step ensures no black residue transfers onto hands or clothing when handling the keychains.
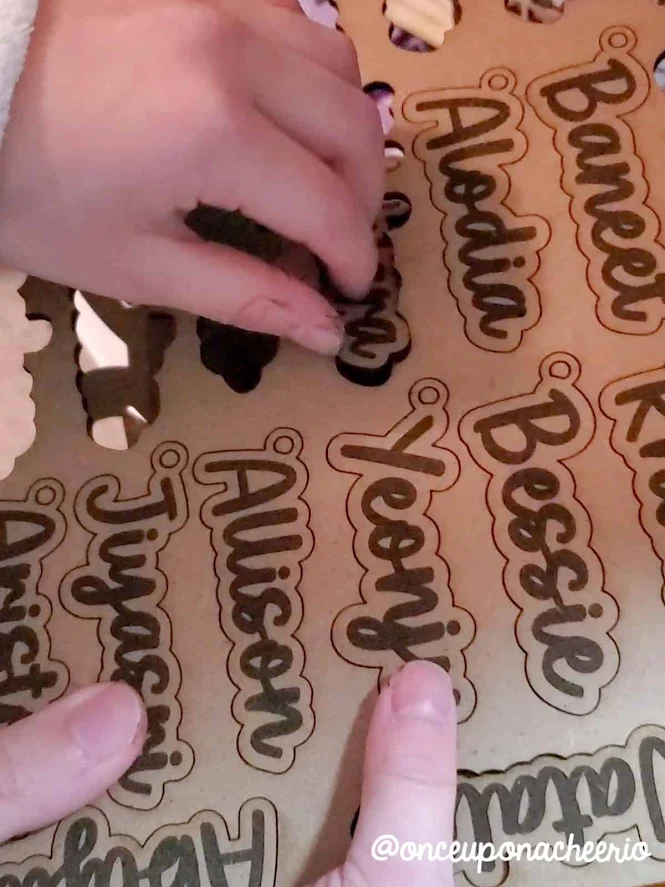
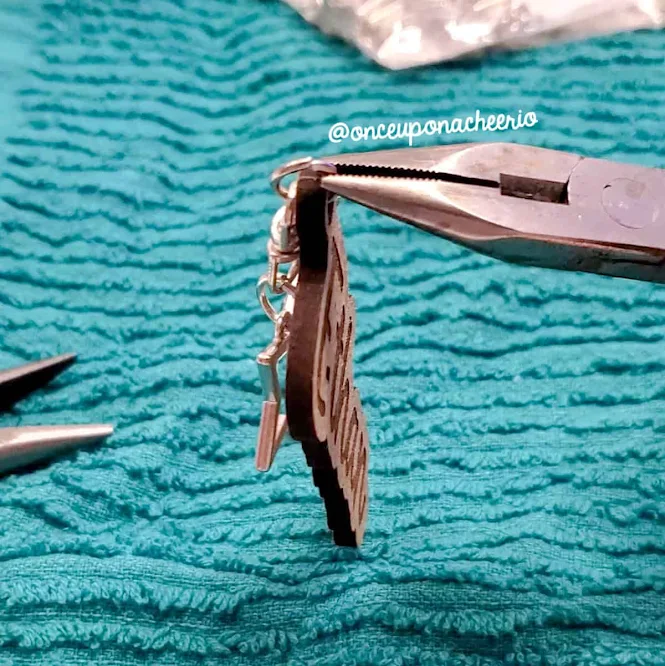
Step 7: Assemble the Keychains
- Attach the engraved and cut name pieces to the fun-shaped keychains using the included jump rings.
Step 8: Package the Gift with Personalized Labels
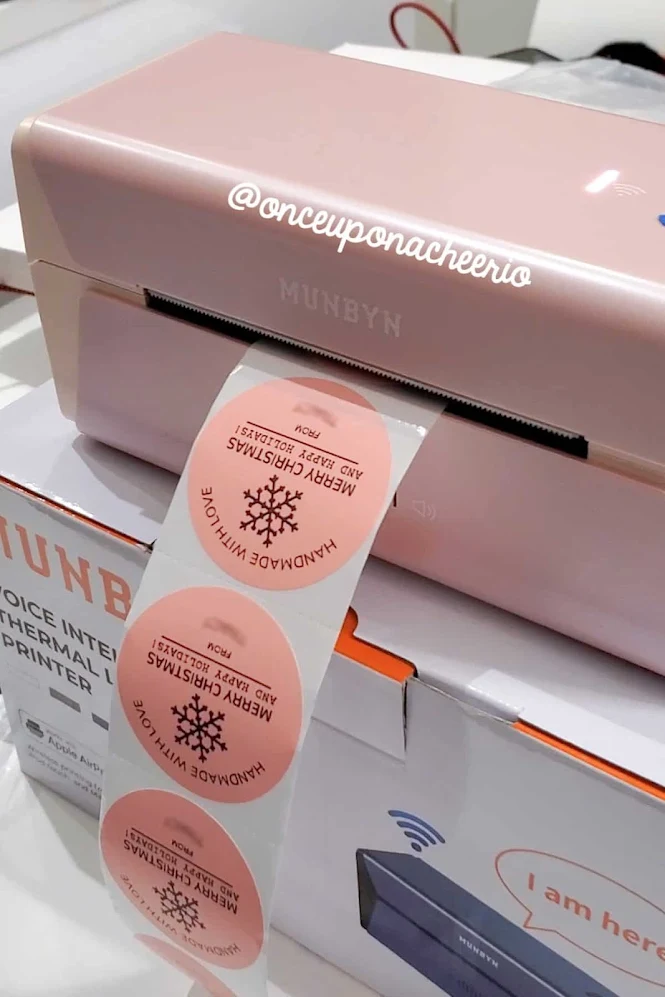
- Using the Munbyn label printer, design and print out custom labels wishing the recipients a Merry Christmas and Happy Holidays.
- We added a personal touch by writing the kids' names on the labels so their classmates know who the gift is from.
- Apply the sticker labels onto the small reusable bags.
- Place each keychain in a bag and seal it up. Now they're ready for gifting!
Do you make Christmas gifts for your kids' class? I'd love to see it! Please share it with me on Instagram and/or use the #onceuponacheerio hashtag.
This is an original craft tutorial written by Juli Anne of Once Upon a Cheerio. Please do not claim this craft tutorial as your own. If you wish to share this craft tutorial, you may link to this blog post, but please do not reprint it on your site. You may keep a copy for personal use, but please DO NOT sell or distribute the craft tutorial.


Post a Comment